Objective
This SOP explains how to make a casual bus booking in the Roll Call Parent app. Follow these steps to select a date, choose a bus stop, and confirm the booking successfully.
Video
Key Steps
1. Log in to the Roll Call Parent app 0:00
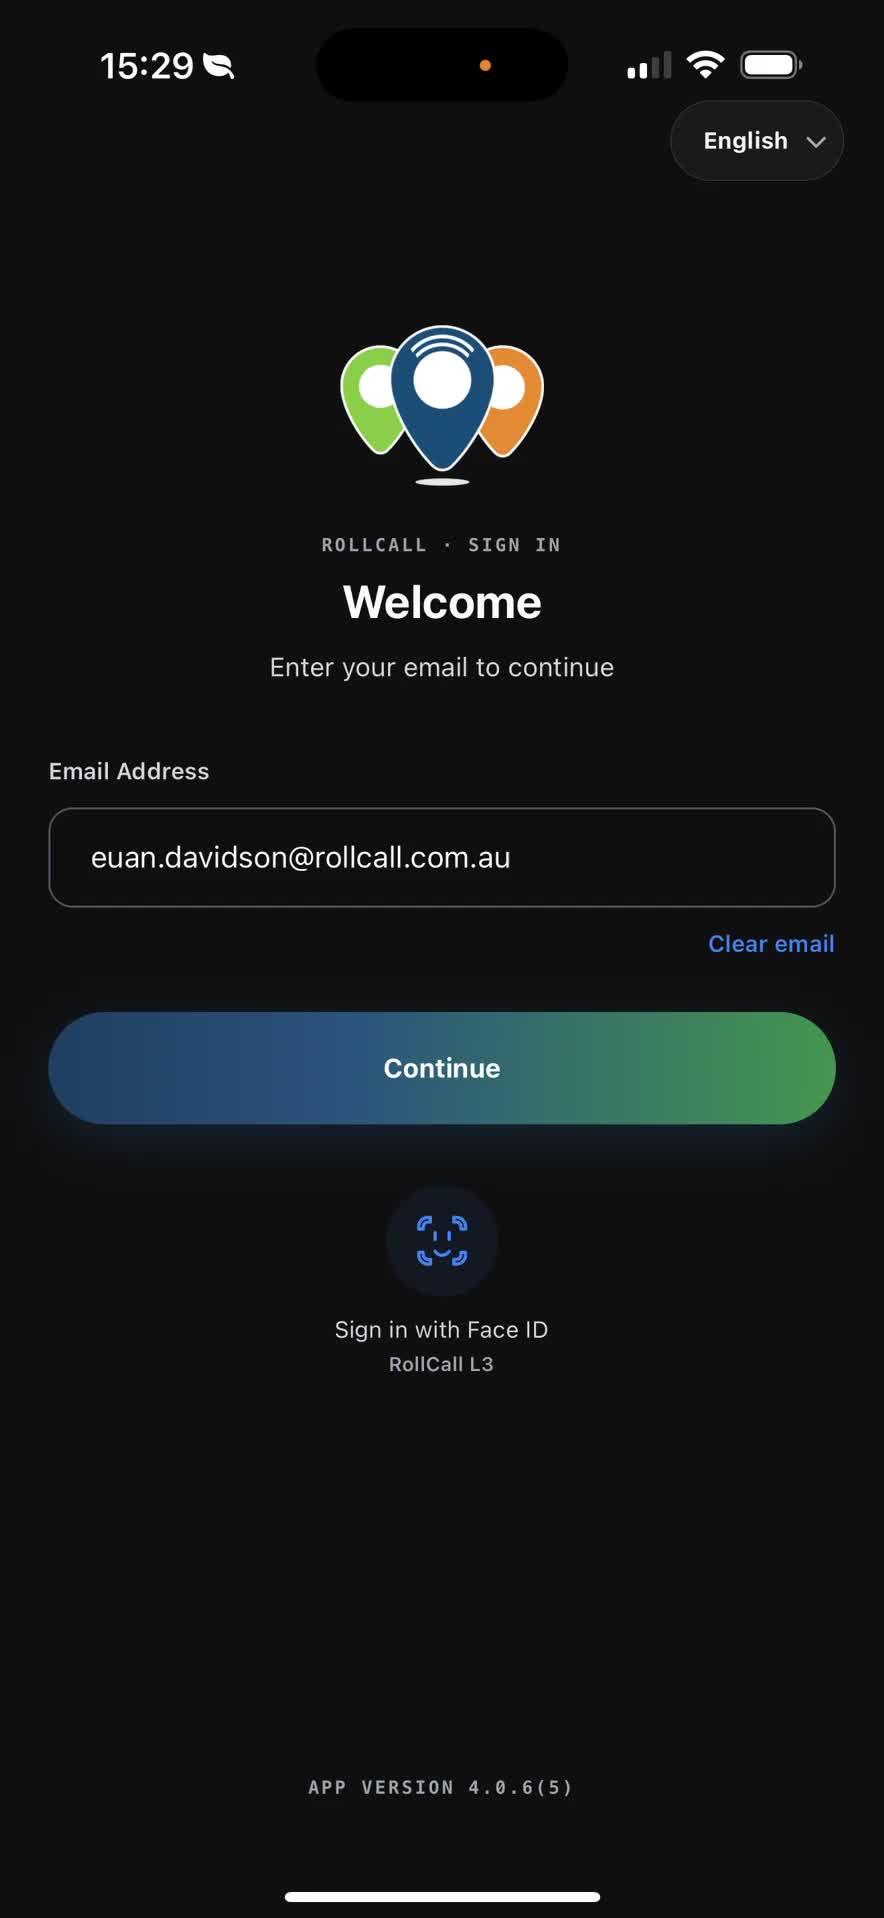
Open the Roll Call Parent app.
Log in using either:
Your email address and password, or
The SSO sign-in option.
Confirm you are on the main app screen before continuing.
2. Open the booking change menu 0:15
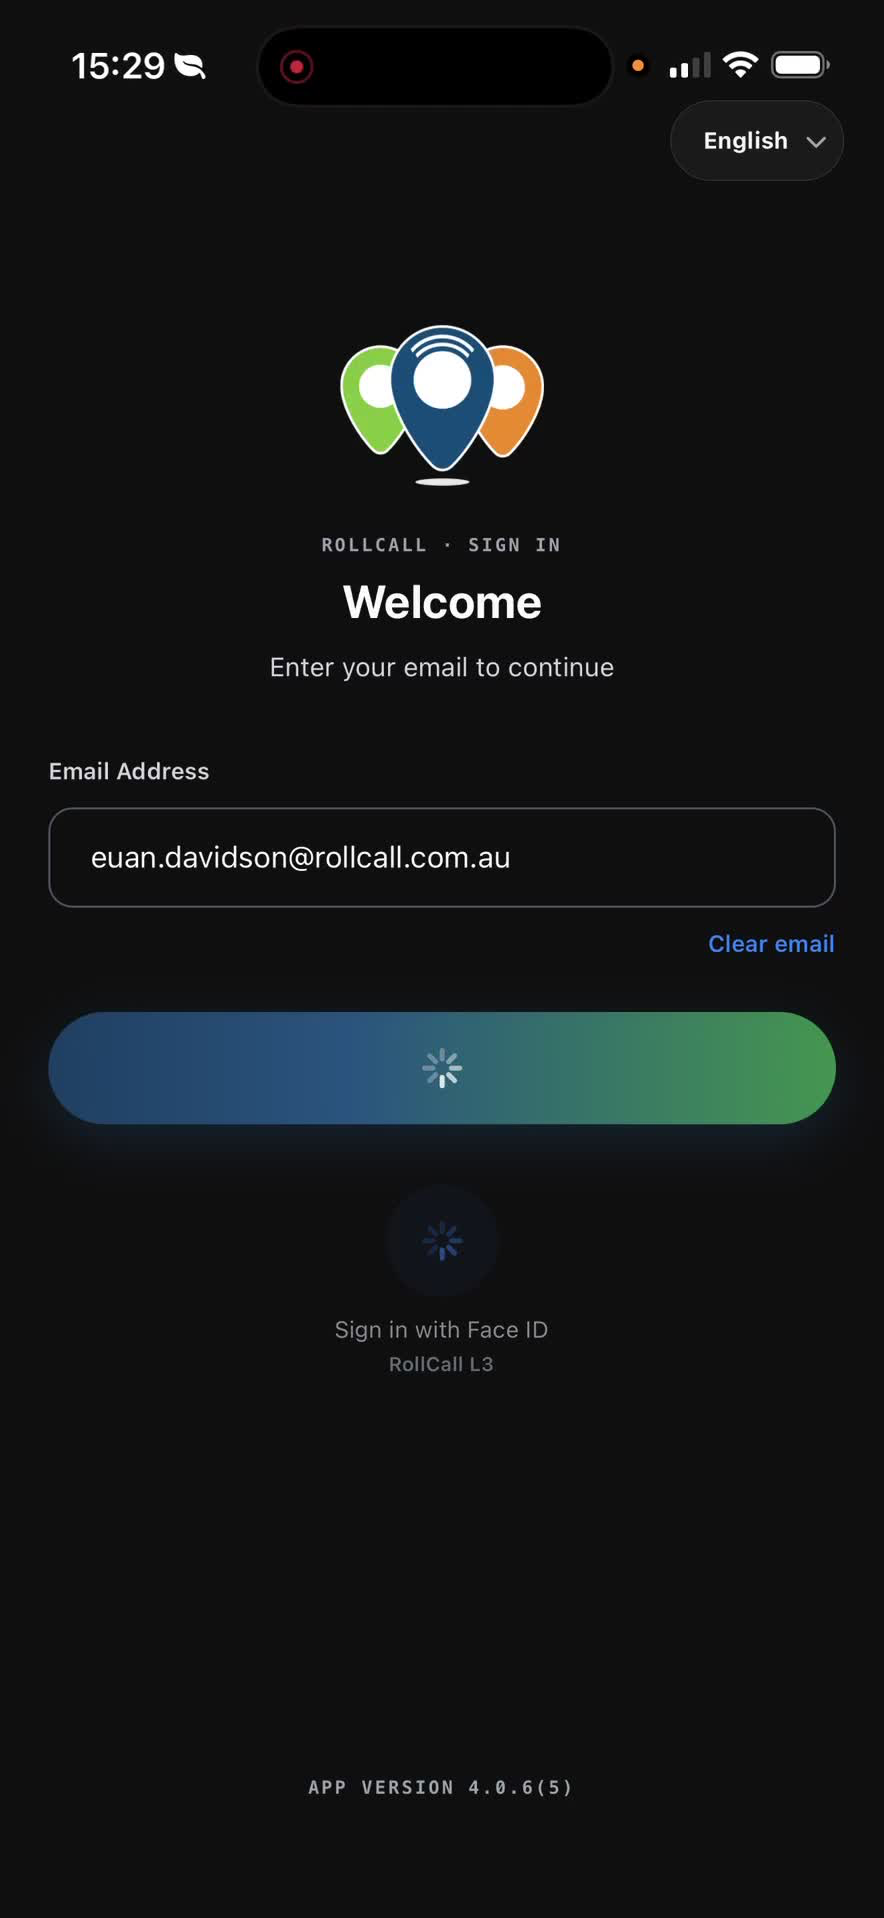
Tap the Bookings tab at the bottom left of the screen.
Select Make a change.
Choose Short-term bus change to begin a casual booking.
3. Select the booking date and session 0:28
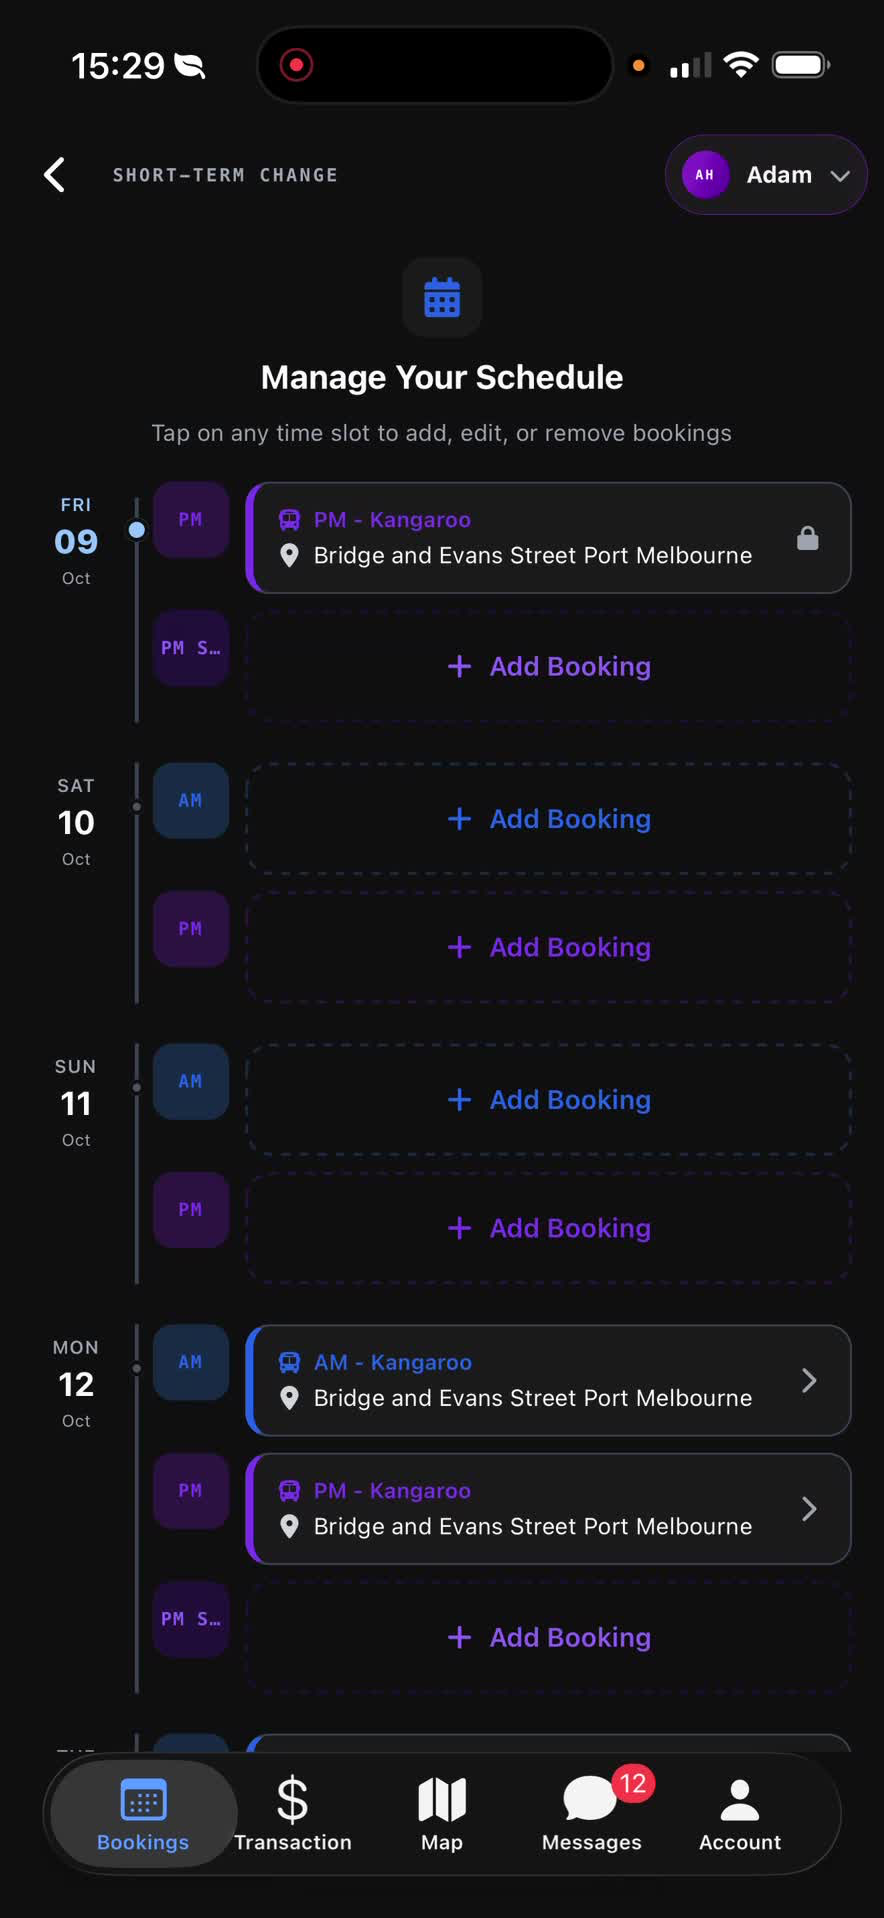
Choose the date you want to make the booking for.
Select the relevant event group:
AM for morning travel
PM for afternoon travel
Review your selection before proceeding.
4. Add the booking and view available stops 0:38
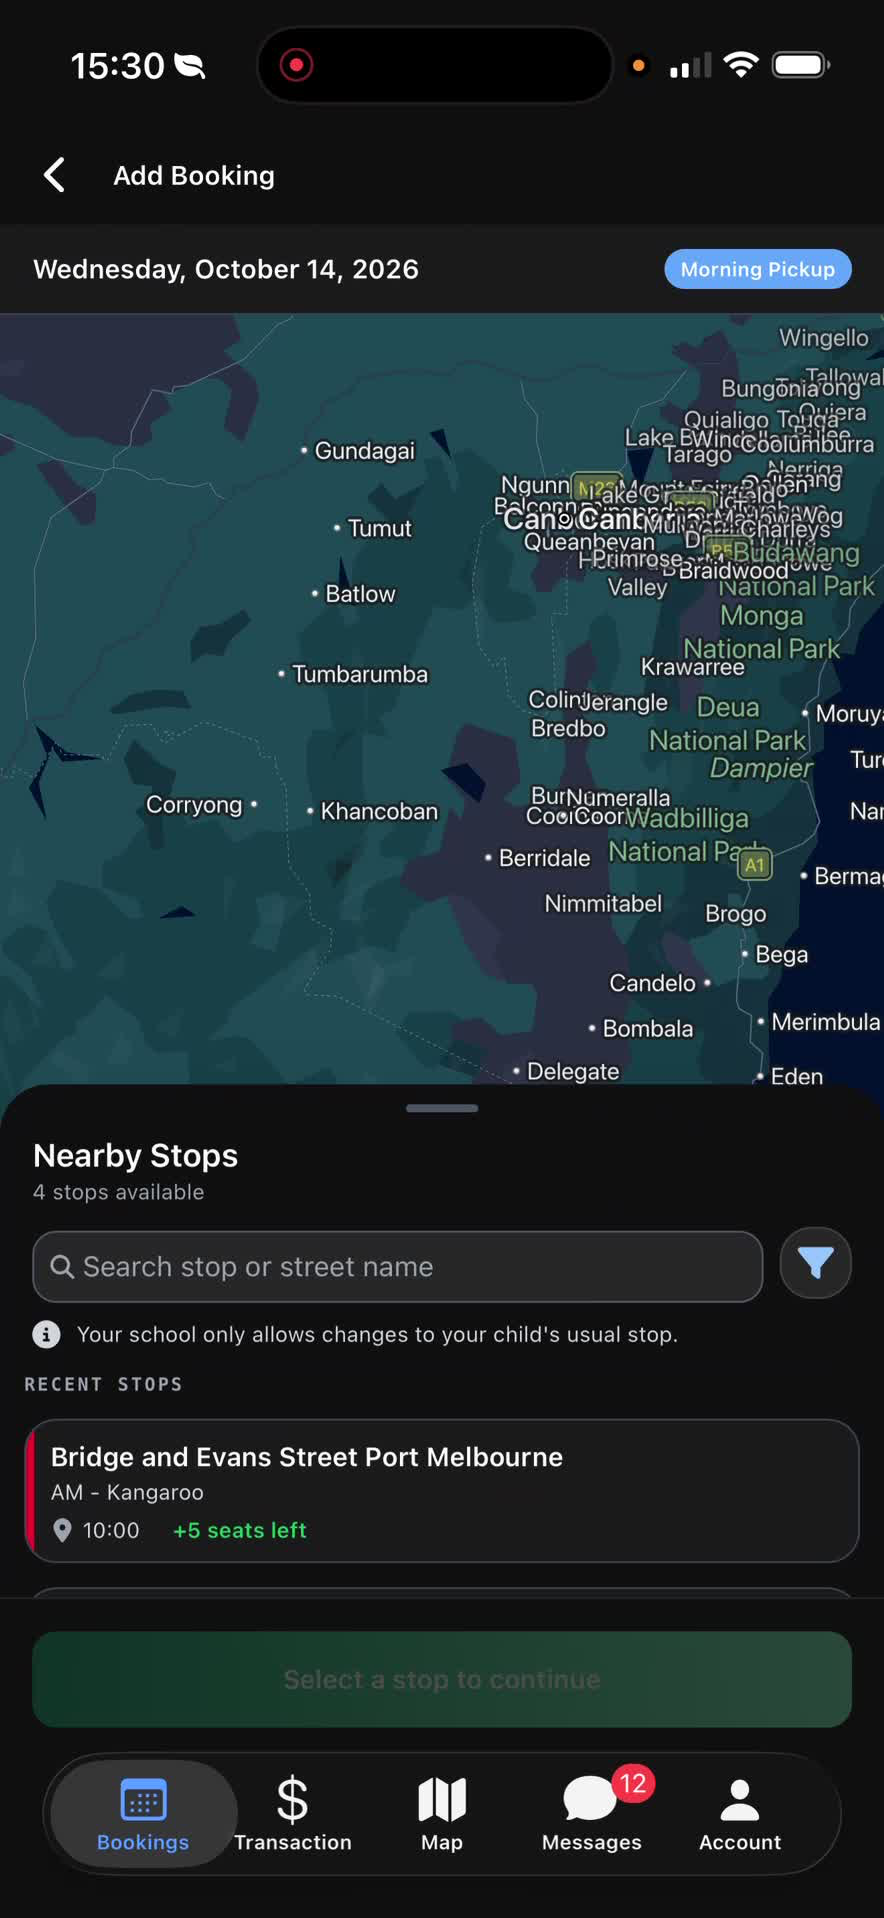
Tap Add Booking.
A map will appear showing the registered bus stops for the school.
Use this screen to begin comparing available stop options.
5. Review stops using list, filter, or map view 0:48
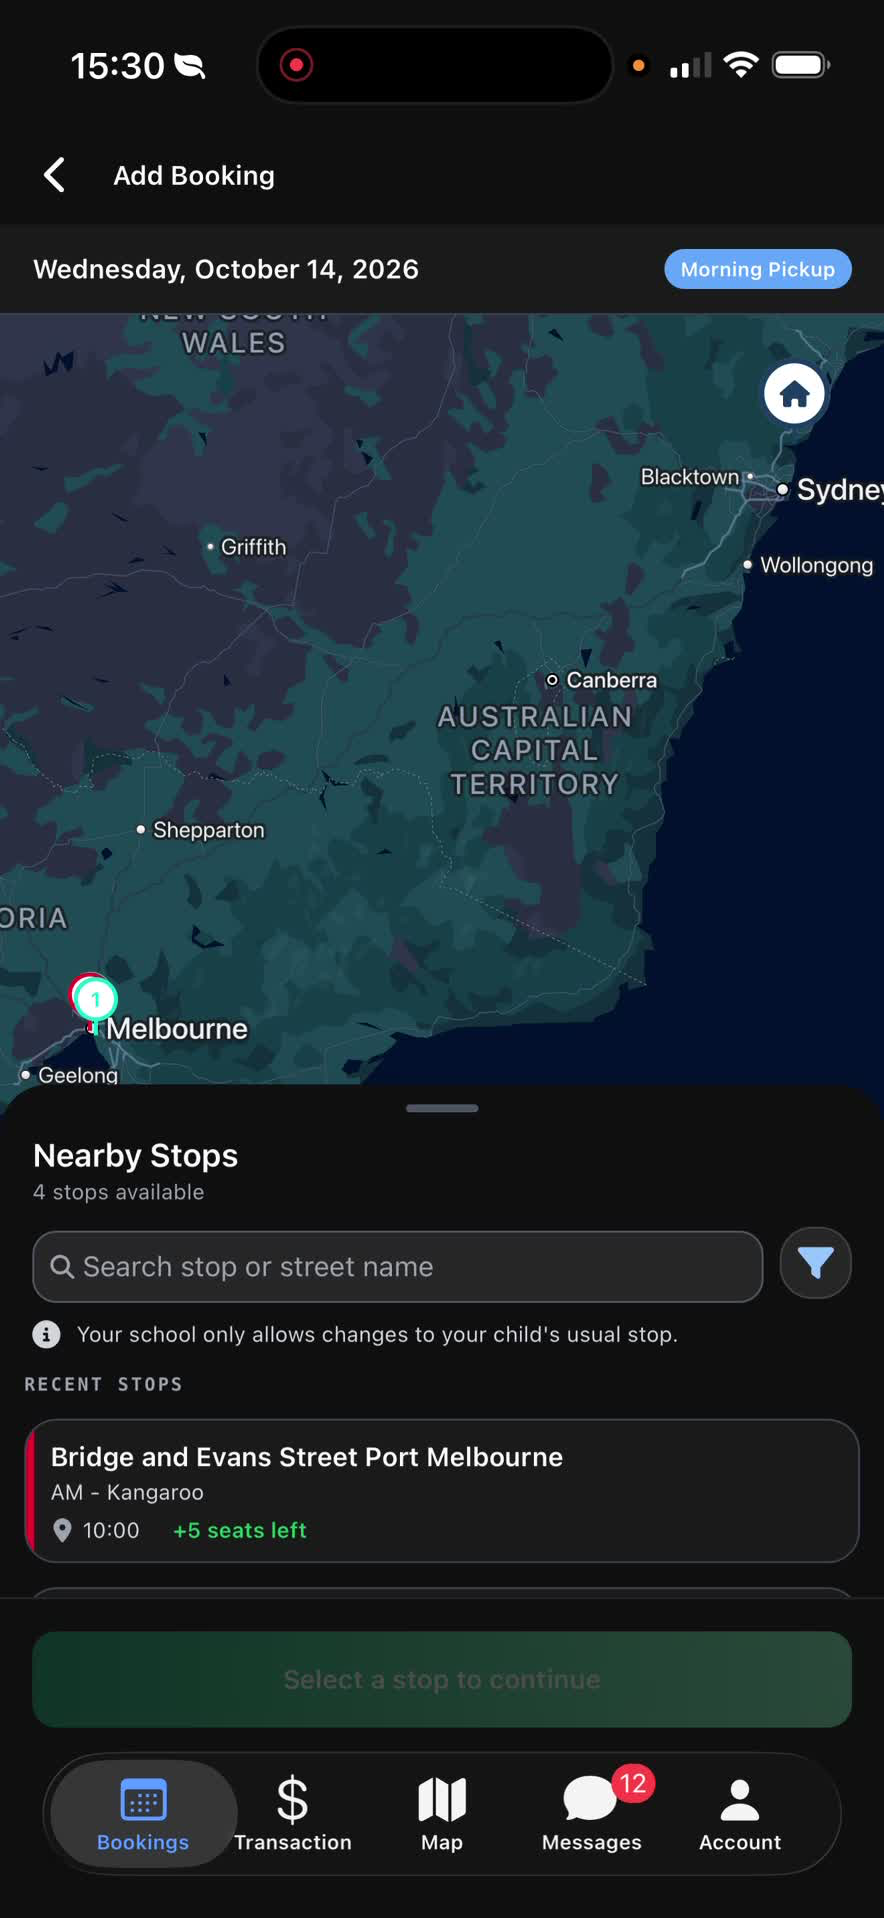
Explore stop options in one of three ways:
List view at the bottom of the screen
Filter by route using the filter icon
Browse the map by zooming in and out
Use the view that makes it easiest to find the correct stop.
6. Compare stop details and narrow your choice 0:59
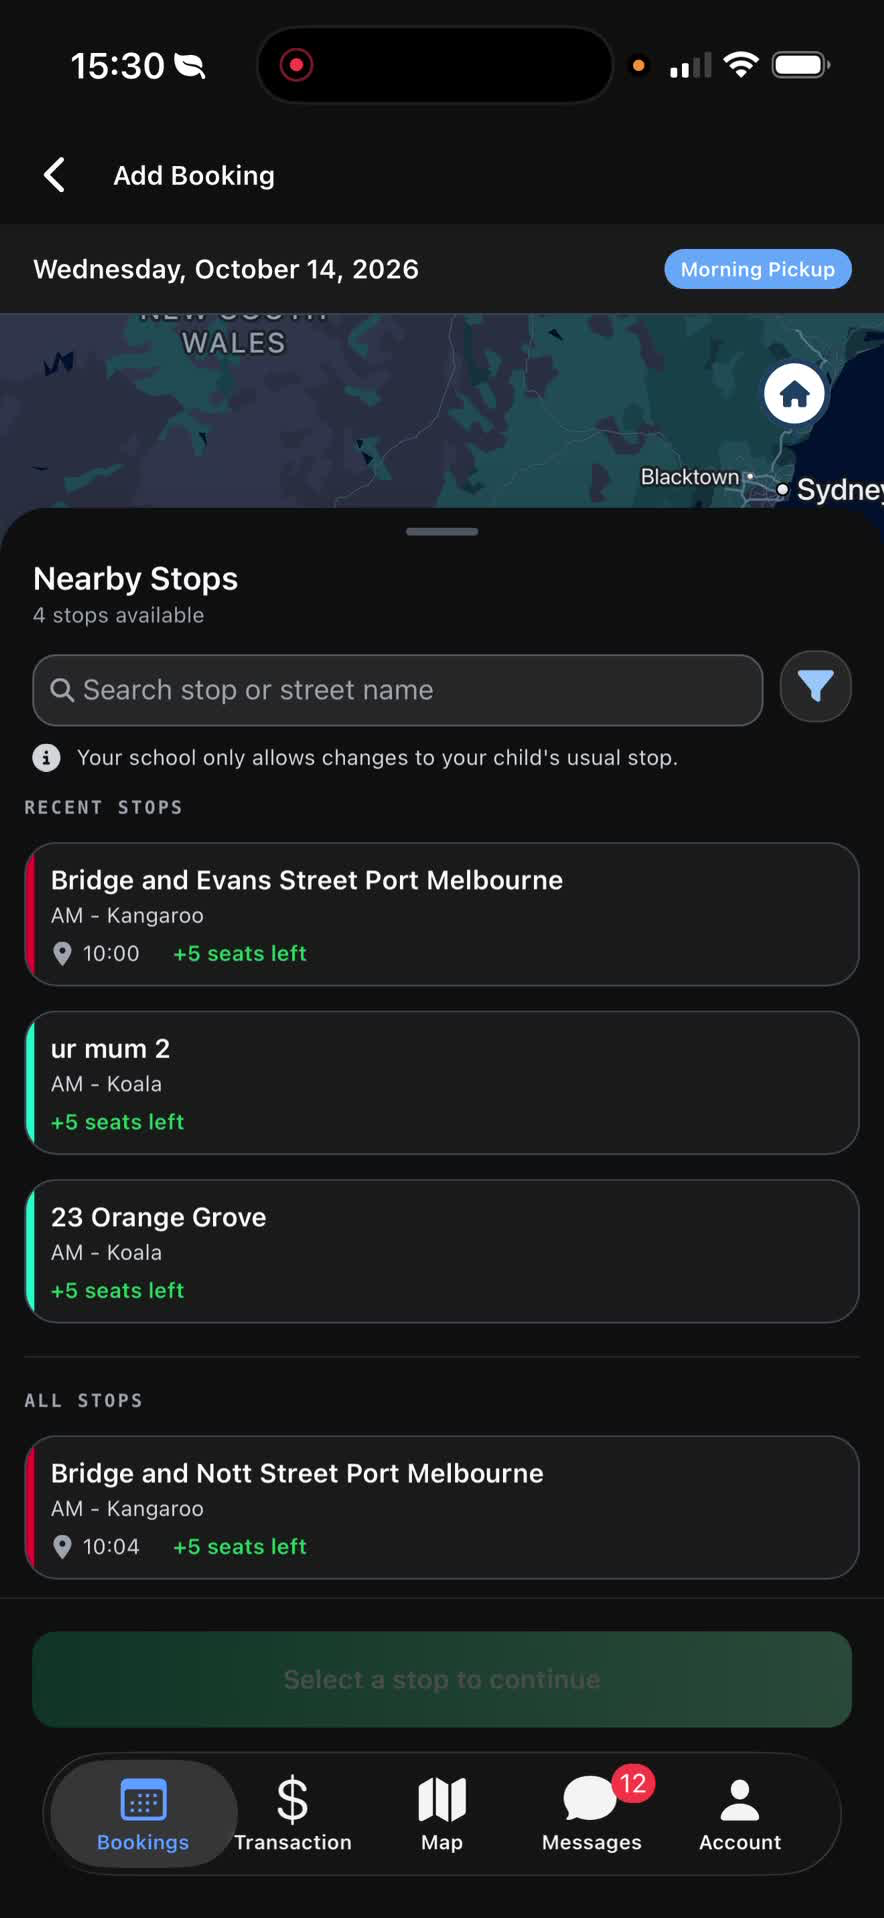
In list view, stops are ordered by distance in kilometres from the address stored in Roll Call.
For each stop, check:
Expected arrival time
Number of seats left
Use the filter icon if you want to narrow results by route.
On the map, note that stop pins match the route colour for easier identification.
7. Select the preferred stop and confirm the booking 1:29
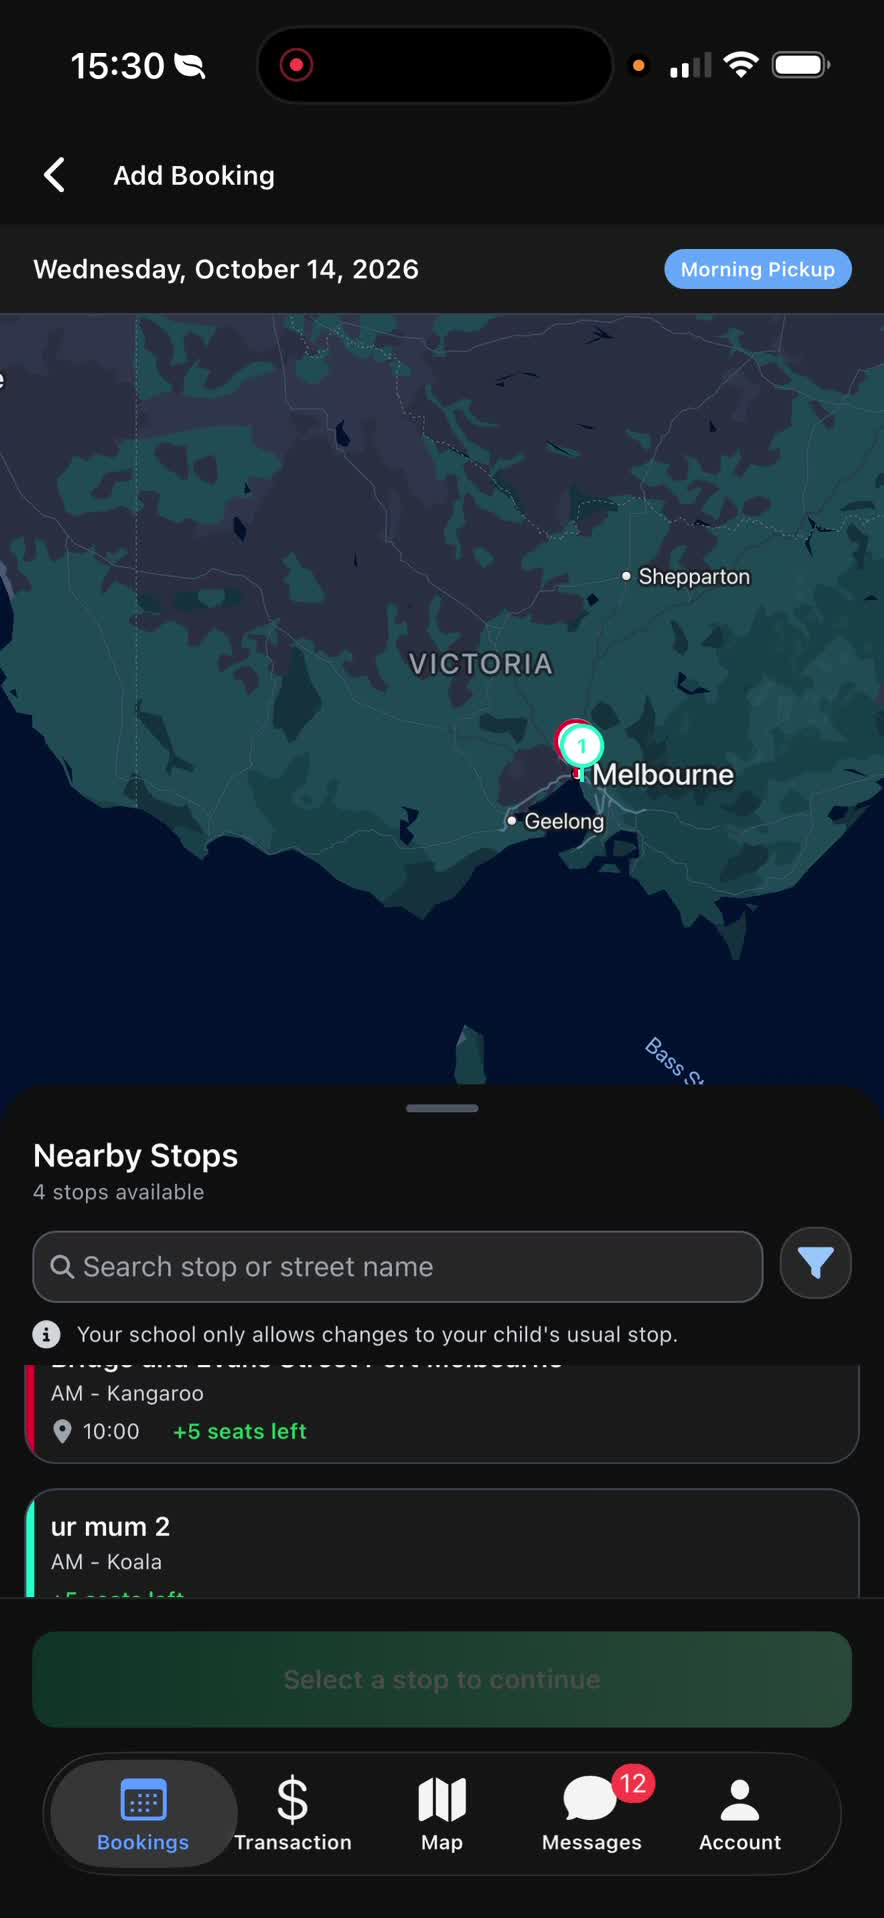
Tap the preferred stop once you have chosen the best option.
Select Add Booking to confirm the stop selection.
Review the booking details carefully before finalizing.
8. Review confirmation and finish 1:43
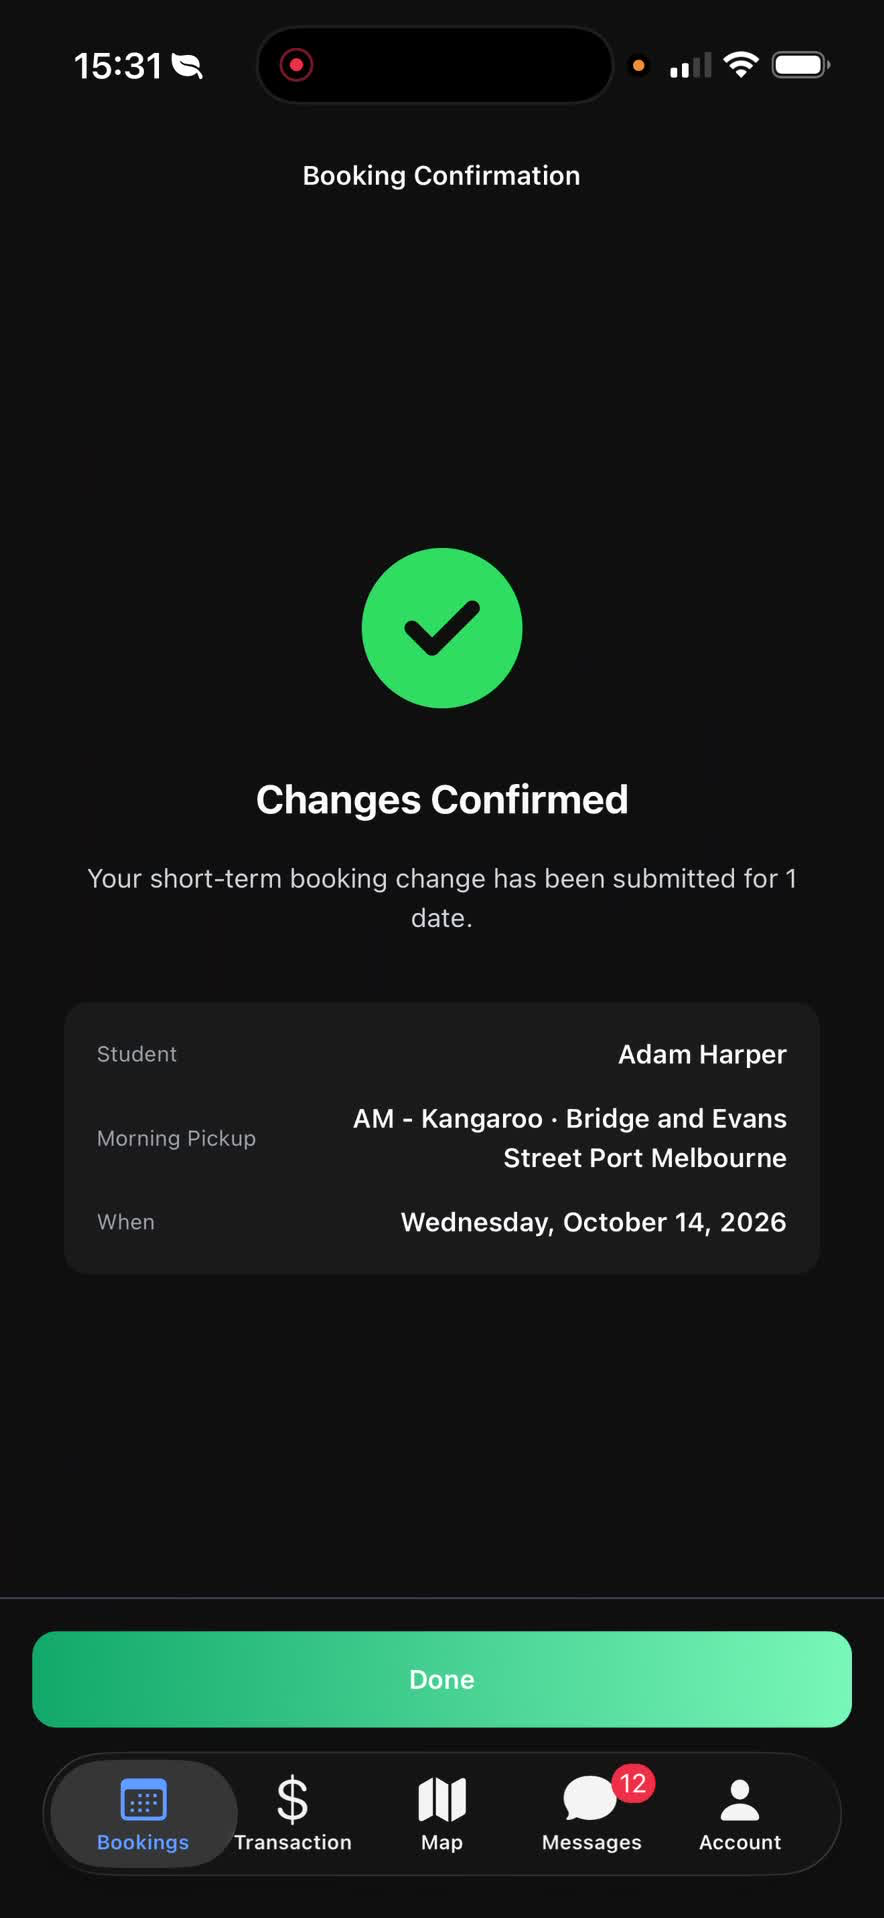
A booking confirmation screen will appear showing the confirmed changes.
Check all details to ensure they are correct.
Tap Done to complete the process.
Confirm the booking now appears in the app.
Cautionary Notes
Ensure you select the correct date and AM/PM session before confirming.
Double-check the stop name, route, and arrival time to avoid booking the wrong service.
Seat availability can change, so verify that there are enough seats before confirming.
If the booking details are incorrect, do not tap Done until you have reviewed and corrected them.
Tips for Efficiency
Use the list view first to quickly compare stops by distance and seat availability.
Use the route filter to reduce the number of stops shown.
Use the map view to visually confirm the stop location and route colour.
Keep your login details ready to speed up access to the app.
Review the confirmation screen immediately so any issues can be caught before exiting.
Was this article helpful?
That’s Great!
Thank you for your feedback
Sorry! We couldn't be helpful
Thank you for your feedback
Feedback sent
We appreciate your effort and will try to fix the article