Overview
The Bulk Booking Cancellation feature allows schools to cancel bus bookings for multiple students across a selected date range in a single action.
This feature is ideal for managing:
School camps
Excursions
Sports carnivals
Pupil-free days
Other events where groups of students will not require transport
Bookings are suspended rather than permanently deleted, allowing them to be reinstated if plans change.
Accessing Bulk Booking Cancellation
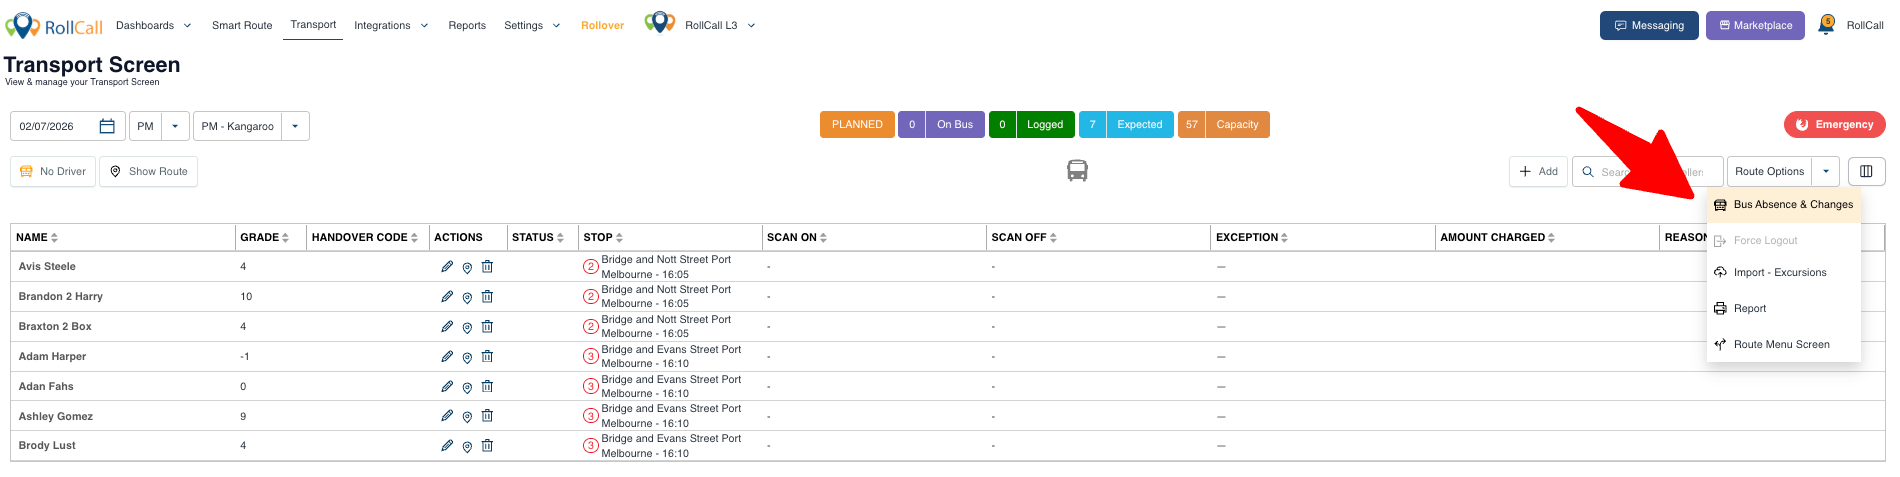
On the Transport Screen, navigating to the Route Options dropdown menu:
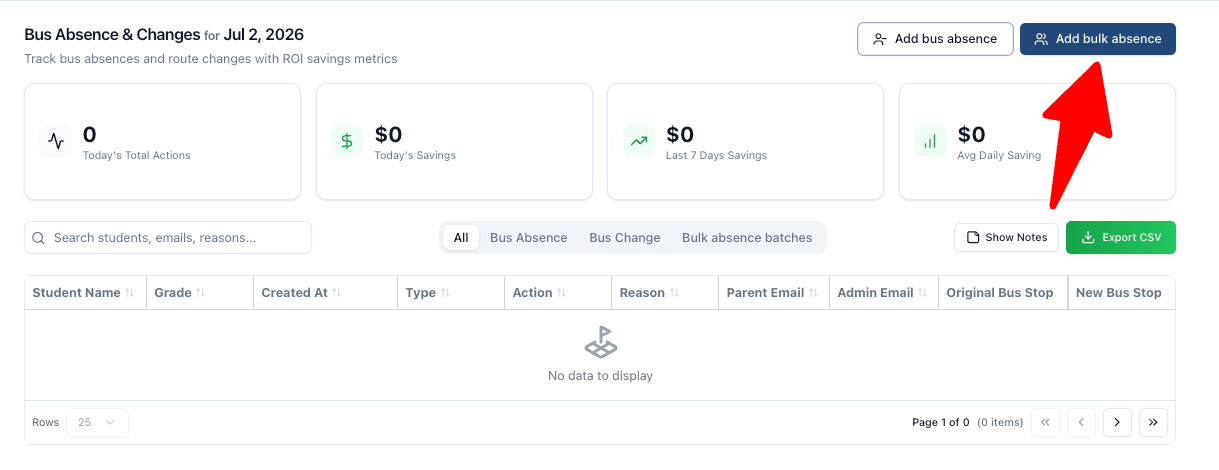
- click Bus Absence & Changes
- then Add Bulk Absence
Step 1 – Enter the Cancellation Details
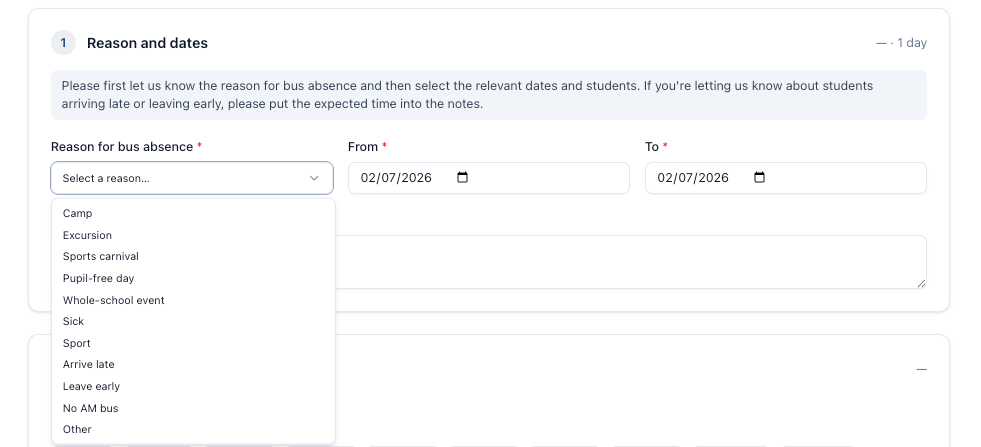
Begin by entering the details for the bulk cancellation.
Complete the following fields:
- Cancellation Reason (e.g. Year 7 Camp – Blue Mountains)
- Start Date
- End Date
The selected date range determines which bookings are eligible for cancellation. Only bookings within these dates will be affected.
Note: Bookings outside the selected date range will remain unchanged.
Step 2 – Select the Students
Choose which students will have their bookings cancelled.
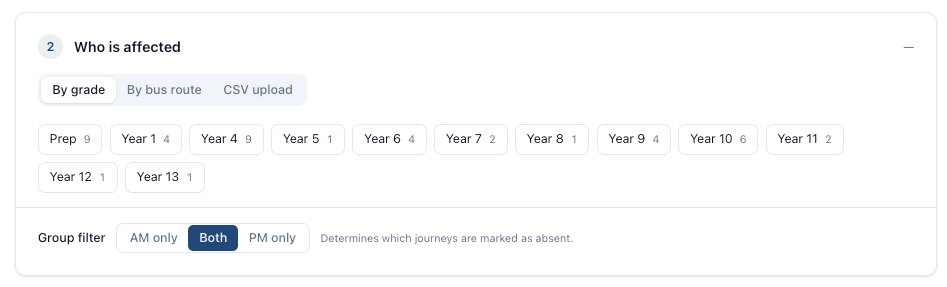
You can select students using one of the following methods:
Filter by Grade
Select one or more year levels to display students with bookings during the selected date range.
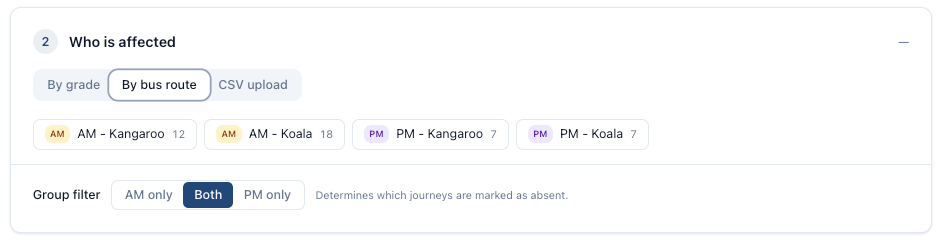
Filter by Bus Route
Select one or more bus routes to display students with bookings on those routes during the selected date range.
This option is useful when cancelling bookings for:
- Individual routes
- Multiple routes
- Services that are not operating on selected dates
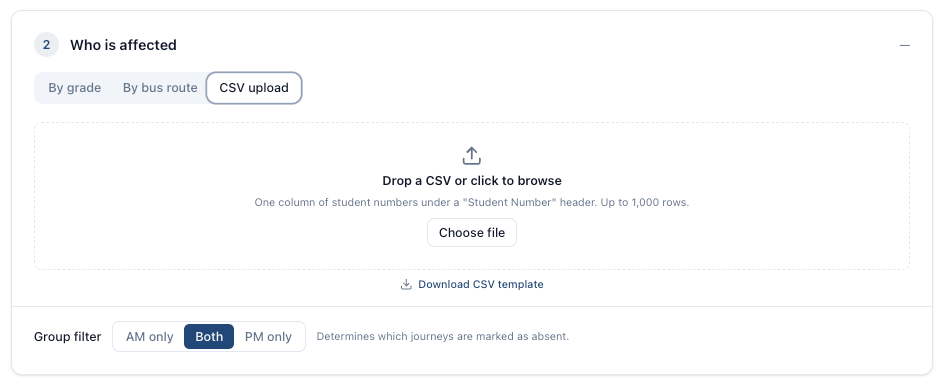
Import a CSV
Upload a CSV containing Student IDs.
This option is useful for:
- Mixed-year sporting teams
- Excursions
- Special events
The CSV format is the same as the Excursion Import template.
Note: Filters can be used to quickly narrow down the list of affected students before reviewing and confirming the cancellation.
Step 3 – Review the Student List
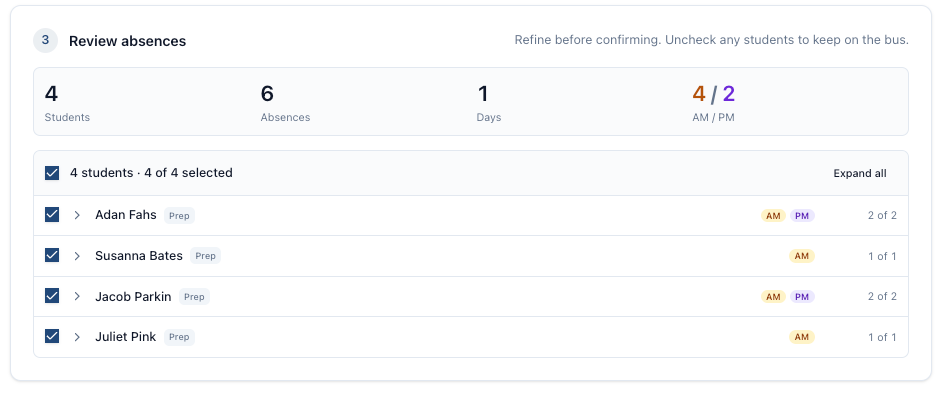
RollCall will display all students with AM and/or PM bookings during the selected dates.
From this list you can:
- Select All students
- Deselect individual students
- Review the bookings before continuing
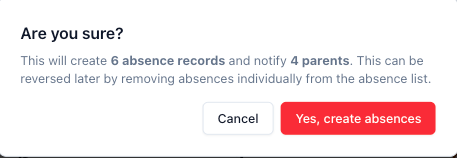
Step 4 – Confirm the Cancellation
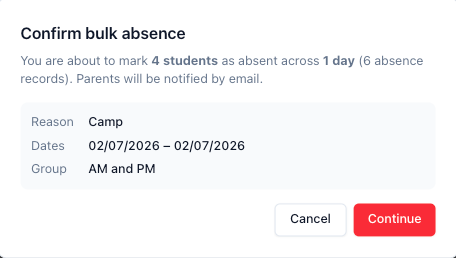
Click Continue.
A second confirmation window will appear before the cancellation is processed.
Step 5 – Review the Parent Notification
Before sending notifications:
- Preview the notification message
- Edit the message if required
Click Yes, create absences to complete the bulk cancellation.
What Happens Next
Once confirmed:
Selected bookings are suspended
Parent notifications are sent
The cancellation is recorded in the audit history
Bus Activity is updated on the Transport Screen
Transport Screen
Cancelled bookings display:
A cancellation symbol
The cancellation reason
Bus Activity history for the booking
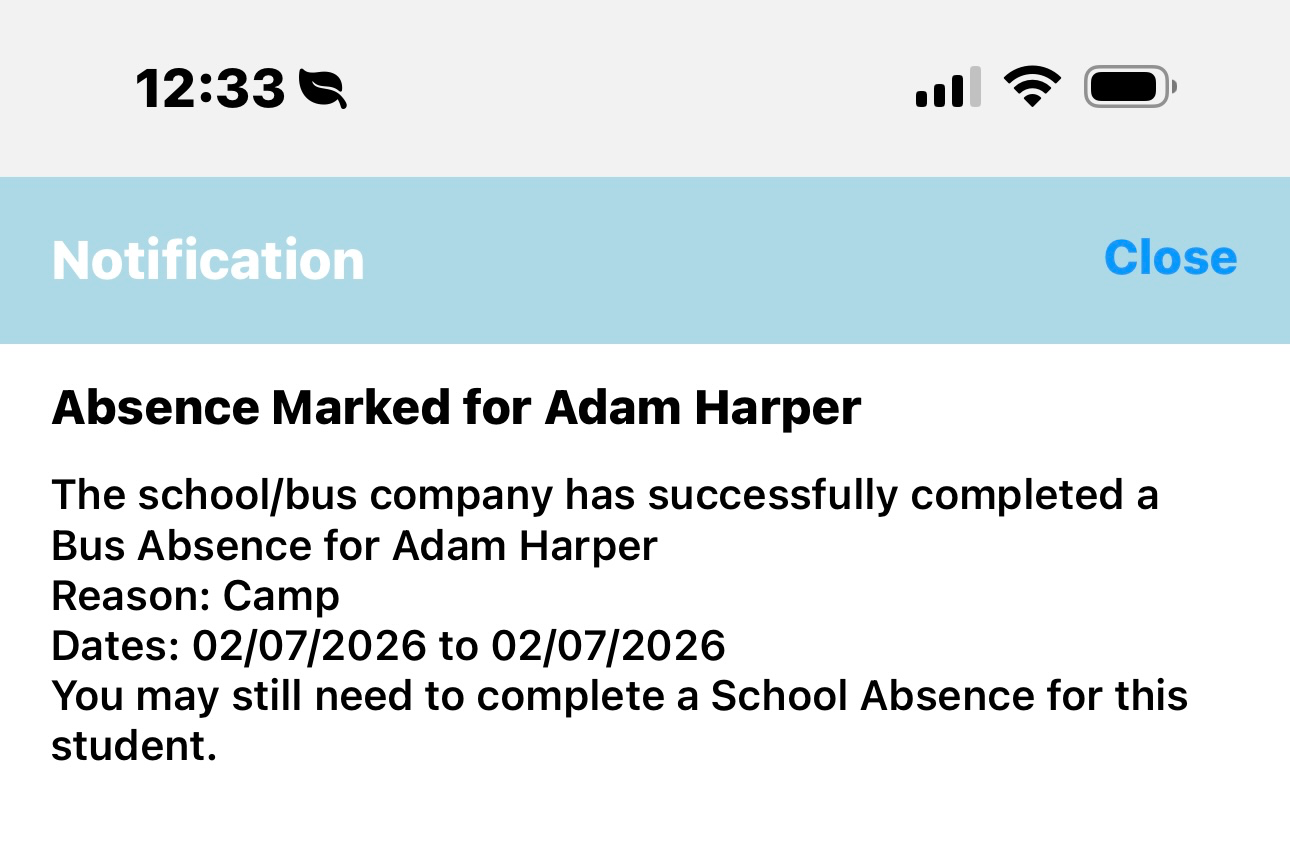
Parent App
Parents will see:
The cancelled booking
The cancellation reason
Updated booking status for the selected dates
Reinstating Cancelled Bookings
If an event is cancelled or a student's plans change:
Open the Cancellation Log
Select the bulk cancellation record
Click Reinstate Bookings
The original bookings will be restored for the selected date range.
Important Notes
Bookings are soft deleted and can be reinstated later.
Only bookings within the selected date range are affected.
Future bookings outside the selected dates remain unchanged.
Parent notifications can be edited before sending.
All cancellations are recorded in the audit log, including:
User who performed the cancellation
Date and time
Cancellation reason
Students affected
Date range
Best Practice Recommendations
✅ Review the student list before confirming
✅ Use the CSV upload for mixed-year groups
✅ Update the parent notification where additional event information is required
✅ Reinstate bookings from the Cancellation Log if an event is postponed or cancelled
✅ Check the Transport Screen after completion to verify the bookings were cancelled correctly
Was this article helpful?
That’s Great!
Thank you for your feedback
Sorry! We couldn't be helpful
Thank you for your feedback
Feedback sent
We appreciate your effort and will try to fix the article