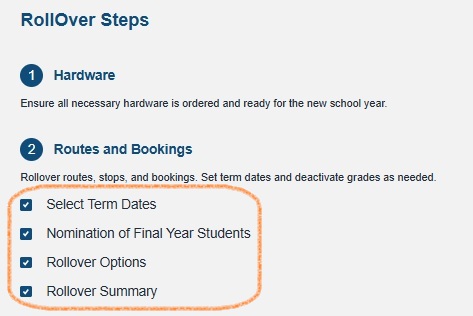
This section covers:
- Term date set up
- Selecting final-year students for deactivation
- Route, Stop, Booking choice
- Rollover date(s) selection
- Rollover summary and confirmation
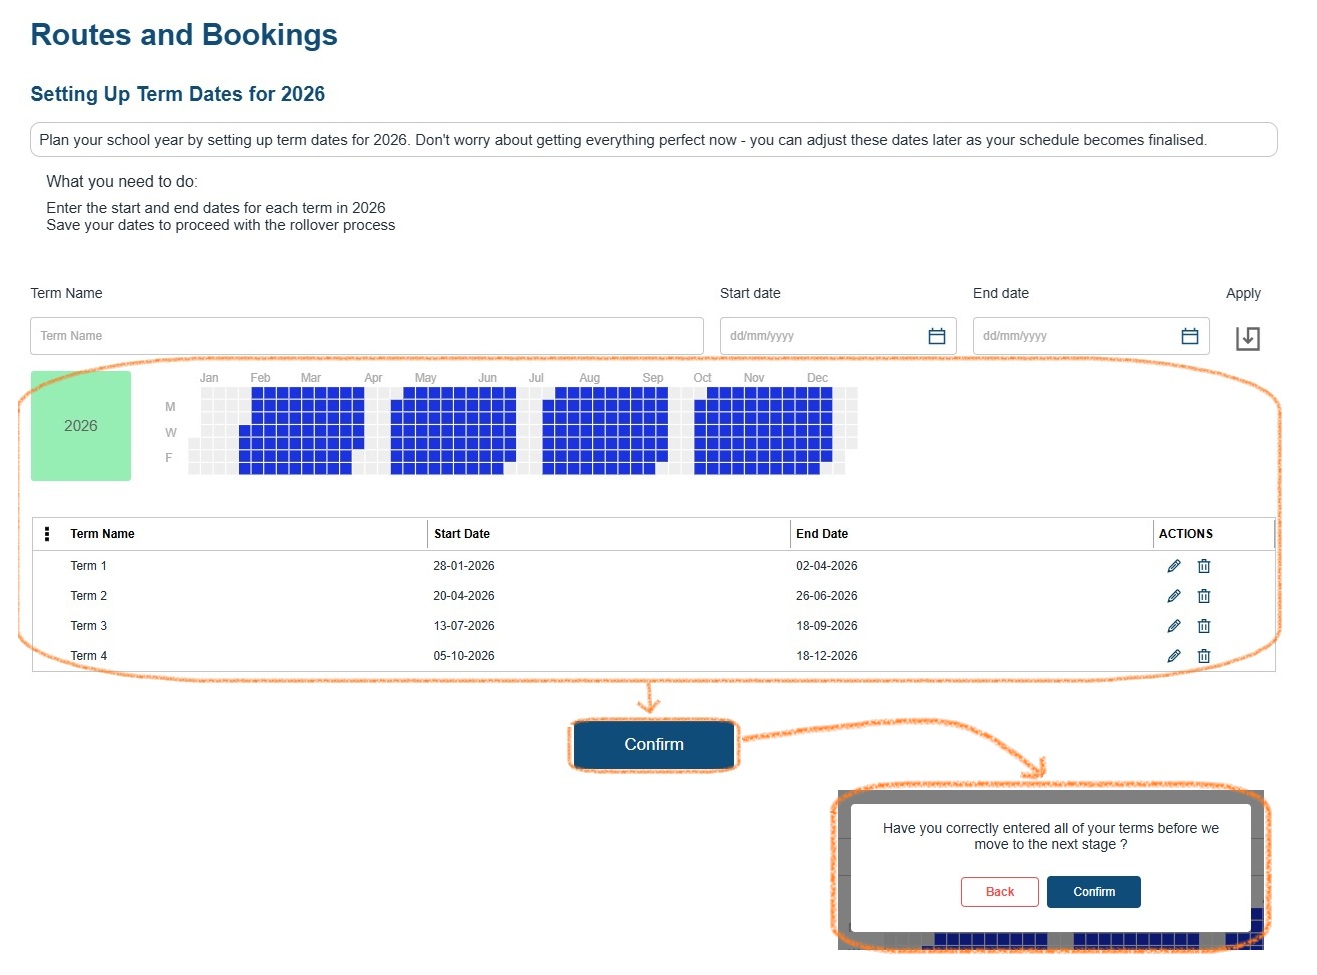
Select Term Dates
Enter the term name (for instance Term 1, Term 2 etc.), select the start/end dates and apply. Repeat until all Term dates for your school have been setup.
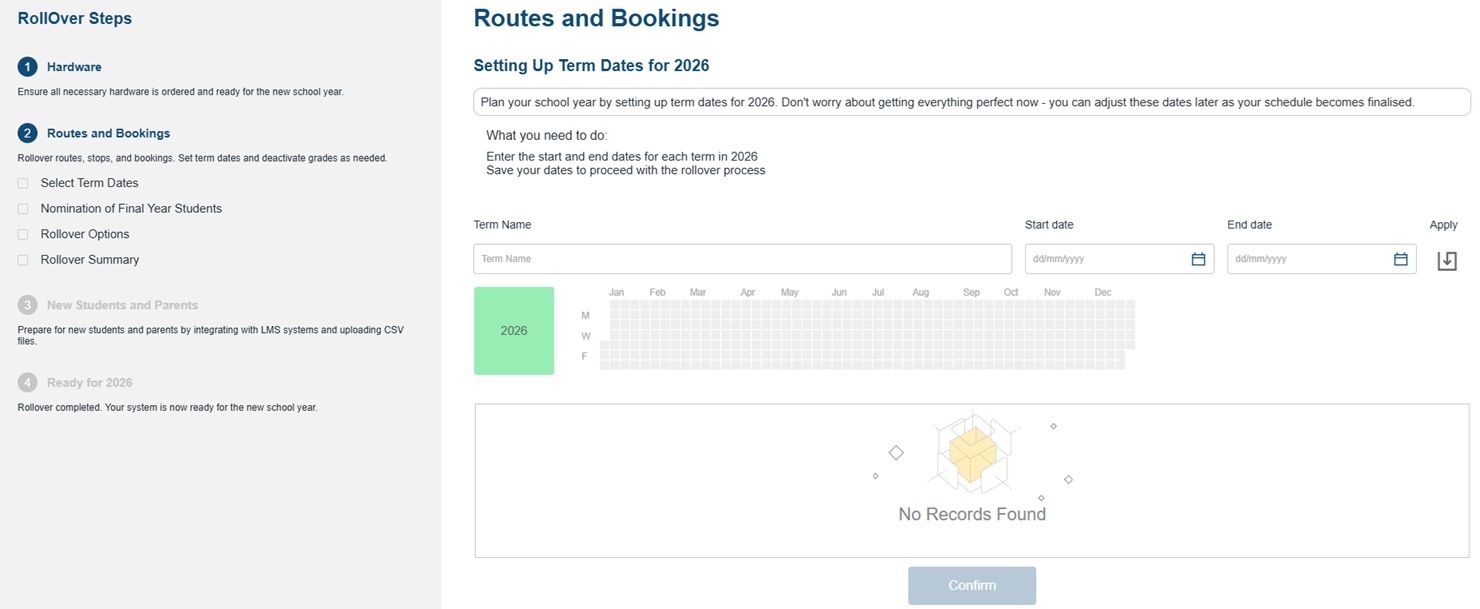
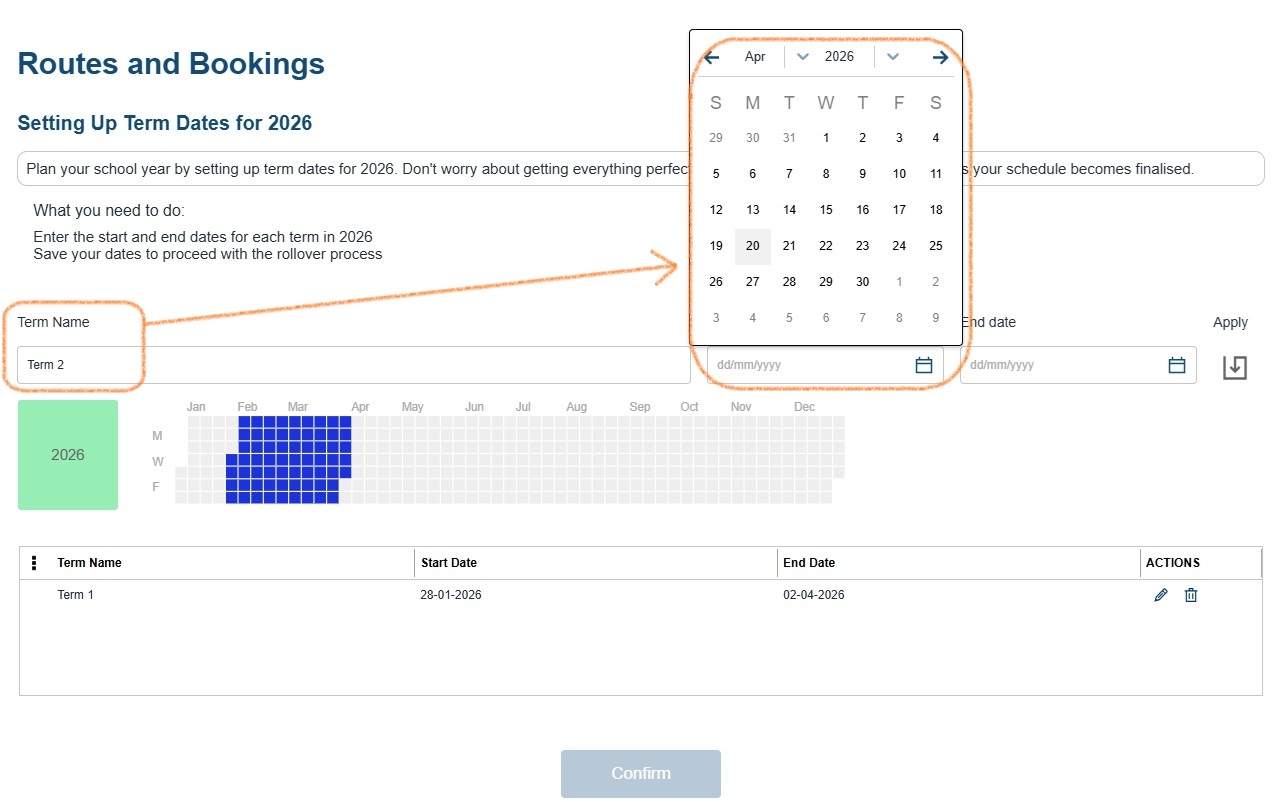
Confirm Dates: Once all term dates are entered, review and confirm.
Note: Choosing these term dates doesn’t set your holiday dates.
- Once the rollover is done, and you are choosing to set up Holidays go to Settings -> Holidays add your holiday dates in. by setting Holiday dates, this hides any bus dates or bookings during those times.
- Training guides on how to create holidays can be found here.
Nomination of Final Year Students
Select the grade that will finish school at the end of this academic year.
For example, in Australia this is usually Grade 12 for high school.
This grade will be automatically deactivated after the year ends (31st December). Don’t worry — current students and their records won’t be affected. This just helps prepare the system for the new school year.
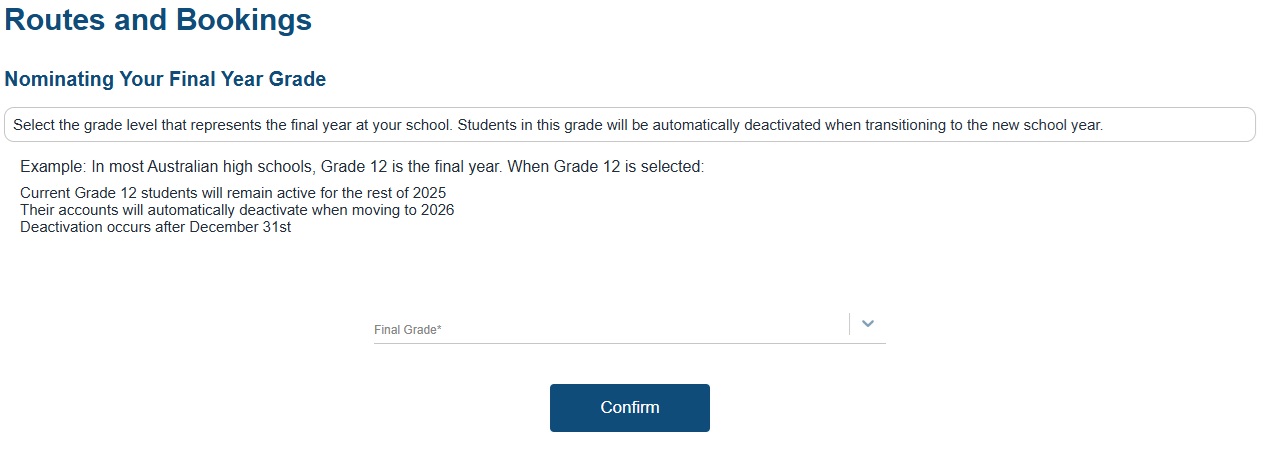
Confirm the selected final year grade and click Confirm
Rollover Options
Below outline the options available for rollover:
No Rollover:
Start fresh for the new year with no pre-set routes or student bookings.
Choose this option if you want to completely rebuild your setup from scratch — for example, if you’re making major changes to your routes.
Routes and Stops Rollover:
Carry over all your current routes and stops, but clear out student bookings.
Choose this option if your transport setup will stay the same next year, and you just need to update which students are booked on each route.
Routes, Stops, and Student Bookings Rollover:
Carry over all your current routes, stops, and student bookings.
(Note: students on routes are linked to their bookings.)
Choose this option if your transport setup wi
ll mostly stay the same next year. You’ll just need to review and update any complex or split family bookings, and add new students when their details are available.
Once you have decided on how you want to proceed, based on what is best for your school and set up, select and click confirm.

When you choose either Routes and Stops Rollover or Routes, Stops and Student Bookings Rollover, you’ll be taken to the Select Routes to Rollover screen.
The difference between these options is whether student bookings are included or not.
Routes and Stops Rollover: Select the routes you want to roll over. Since bookings aren’t included, you won’t need to select rollover dates — the summary section will then display.
Routes, Stops and Student Bookings Rollover: Select the routes to roll over, then choose your rollover date(s) when prompted.
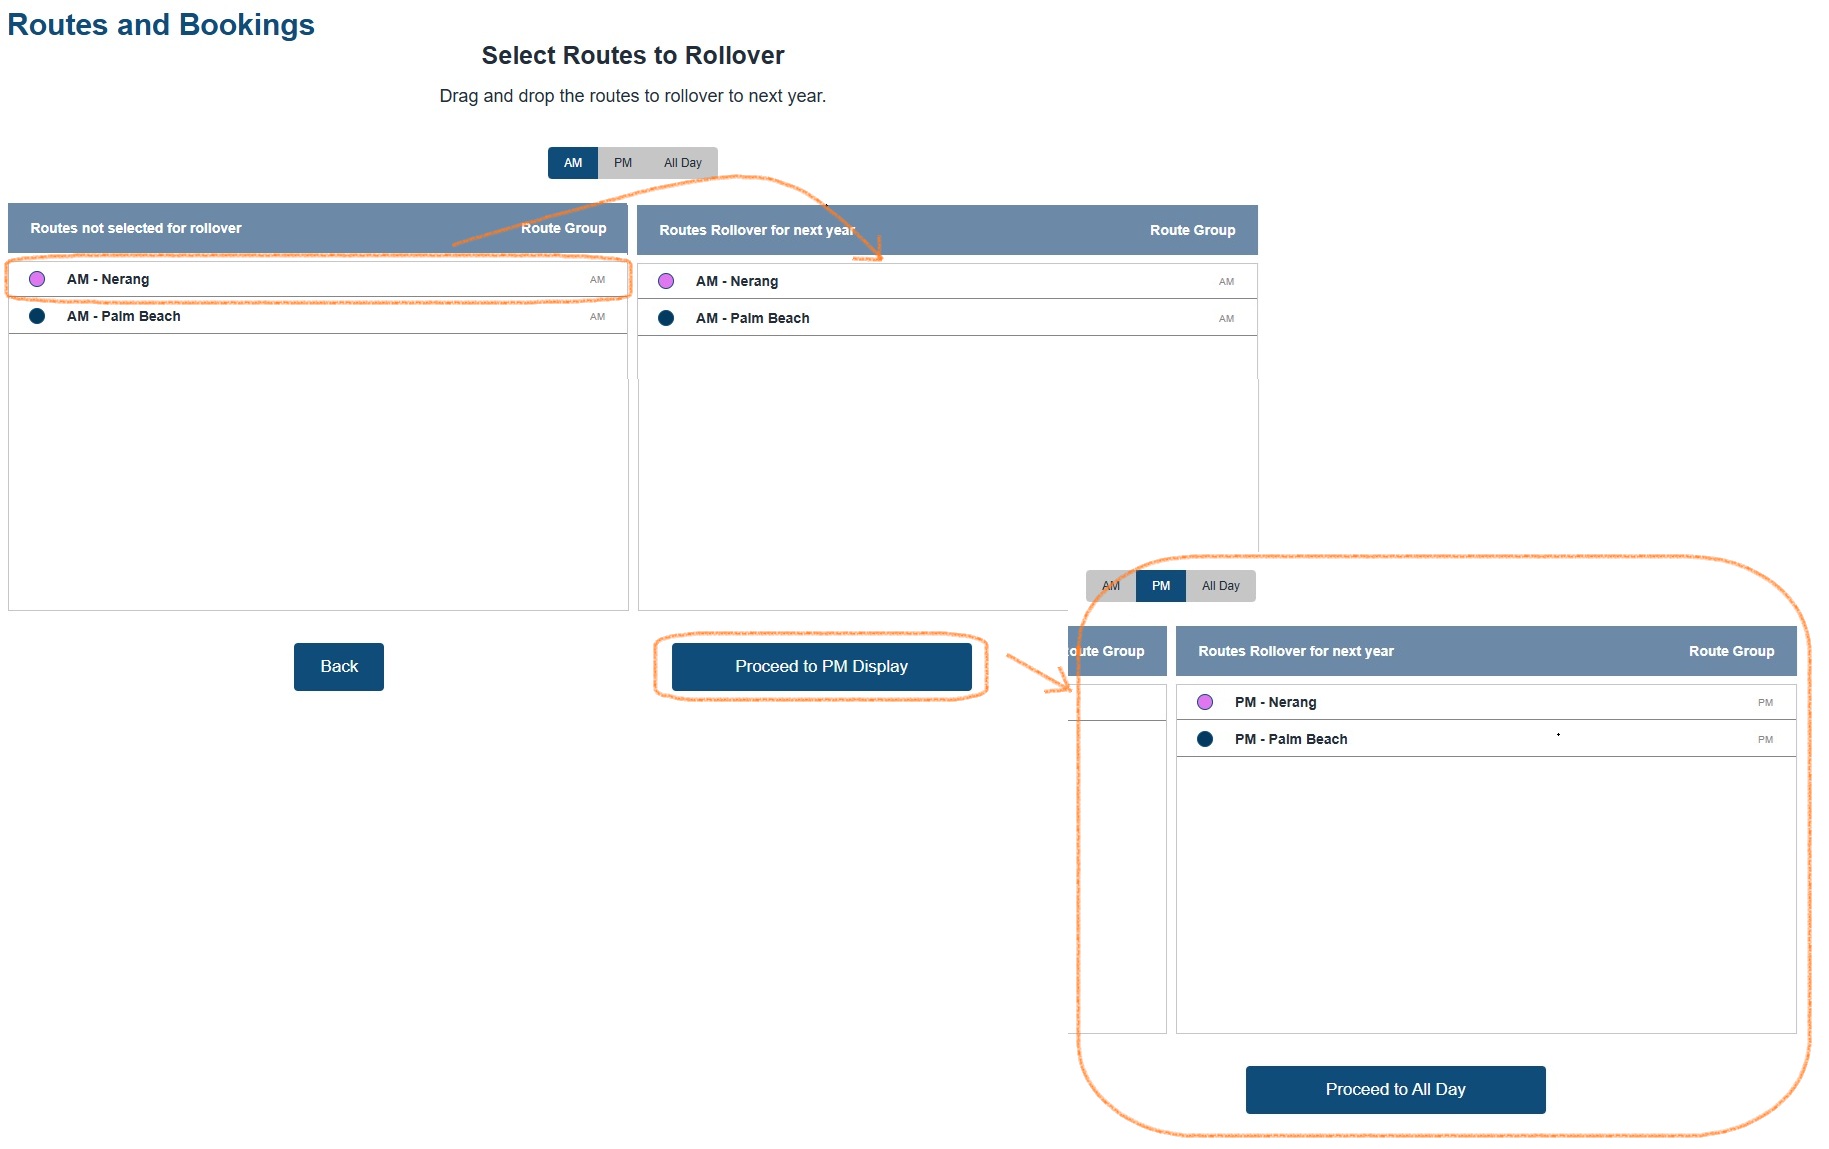
Route Selection
To select routes, simply click and drag them from left to right. Only roll over the routes you want to keep for the new year — if a route is no longer needed, just leave it out.
The Route Selection wizard will guide you step-by-step through selecting AM, then PM, and finally All Day (ie: excursions) routes.
If you choose Routes, Stops and Student Bookings Rollover:
After selecting the routes you want to roll over, you’ll then need to select your rollover dates.
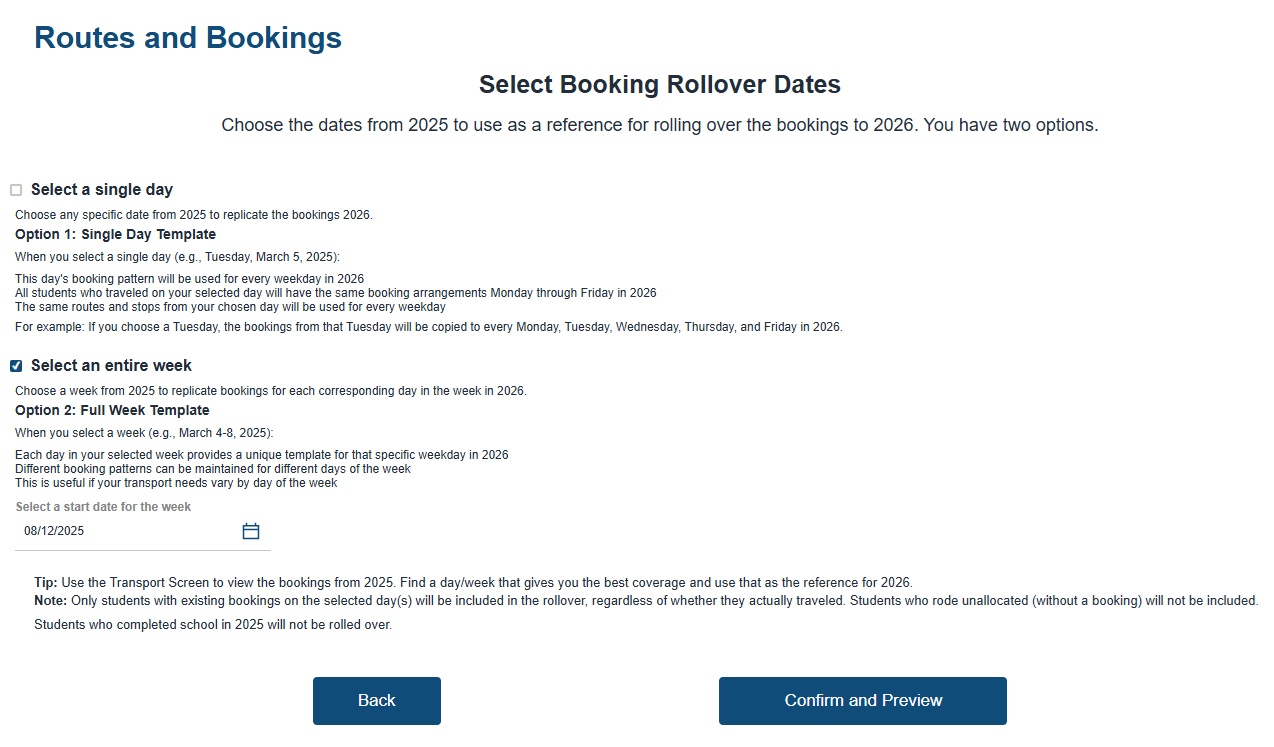
Choosing the Best Rollover Date(s)
When selecting your Rollover period, you have two options:

Use “Actuals” – Choose a past date or week to copy real bookings (this includes students who travelled as casuals or had regular bus bookings). Non-allocated students will be excluded.

Use a Future Date – Pick a day or week that hasn’t been changed. We recommend choosing a date outside your parent booking window (around 10 days ahead) to avoid using amended data.
Whether to choose one date or a whole week - Note this is the same if you choose past or future dates:

Select a Single Day:
Pick one day from the current year to copy student bookings for all days in the new year.
Example: If you choose September 15, bookings from that day will be used for every day next year.

Select an Entire Week:
Pick a week from the current year to copy bookings for each matching day of the week in the new year.
Example: If you choose October 1–7, the bookings from that week will repeat for every week next year.
Tip – Use the Transport Screen for Reference

Check the Transport Screen to view bookings from the current year.

Pick a day or week that best represents your regular bookings — this will help you use the most accurate data for your rollover.

Doing this ensures you capture typical student travel patterns and maintain complete, accurate bookings for the new year.
Once you’ve selected your date or date range, you’ll see a preview of your bookings.
You can click through the dates, AM/PM, and Excursion tabs to review which student bookings will be rolled over.
This is a great time to check and compare with your future bus booking planner to make sure everything looks right.
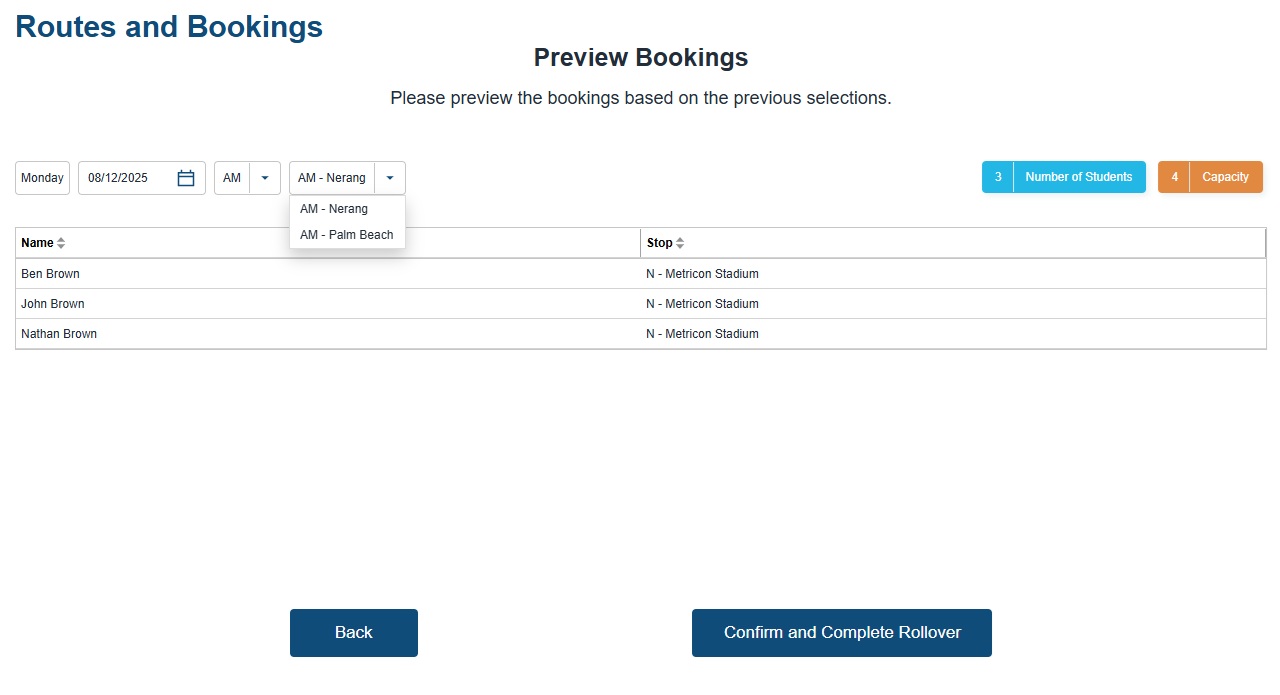
Once you’re happy with the bookings for each route, click Confirm and Complete Rollover.
You’ll then be taken to a summary overview where you can do a final review and confirmation.
Rollover Summary
Once you’ve completed the steps below, a final summary section will appear showing:
Term date setup
Selected final-year students for deactivation
Route, Stop, and Booking choices
Rollover date(s) selection
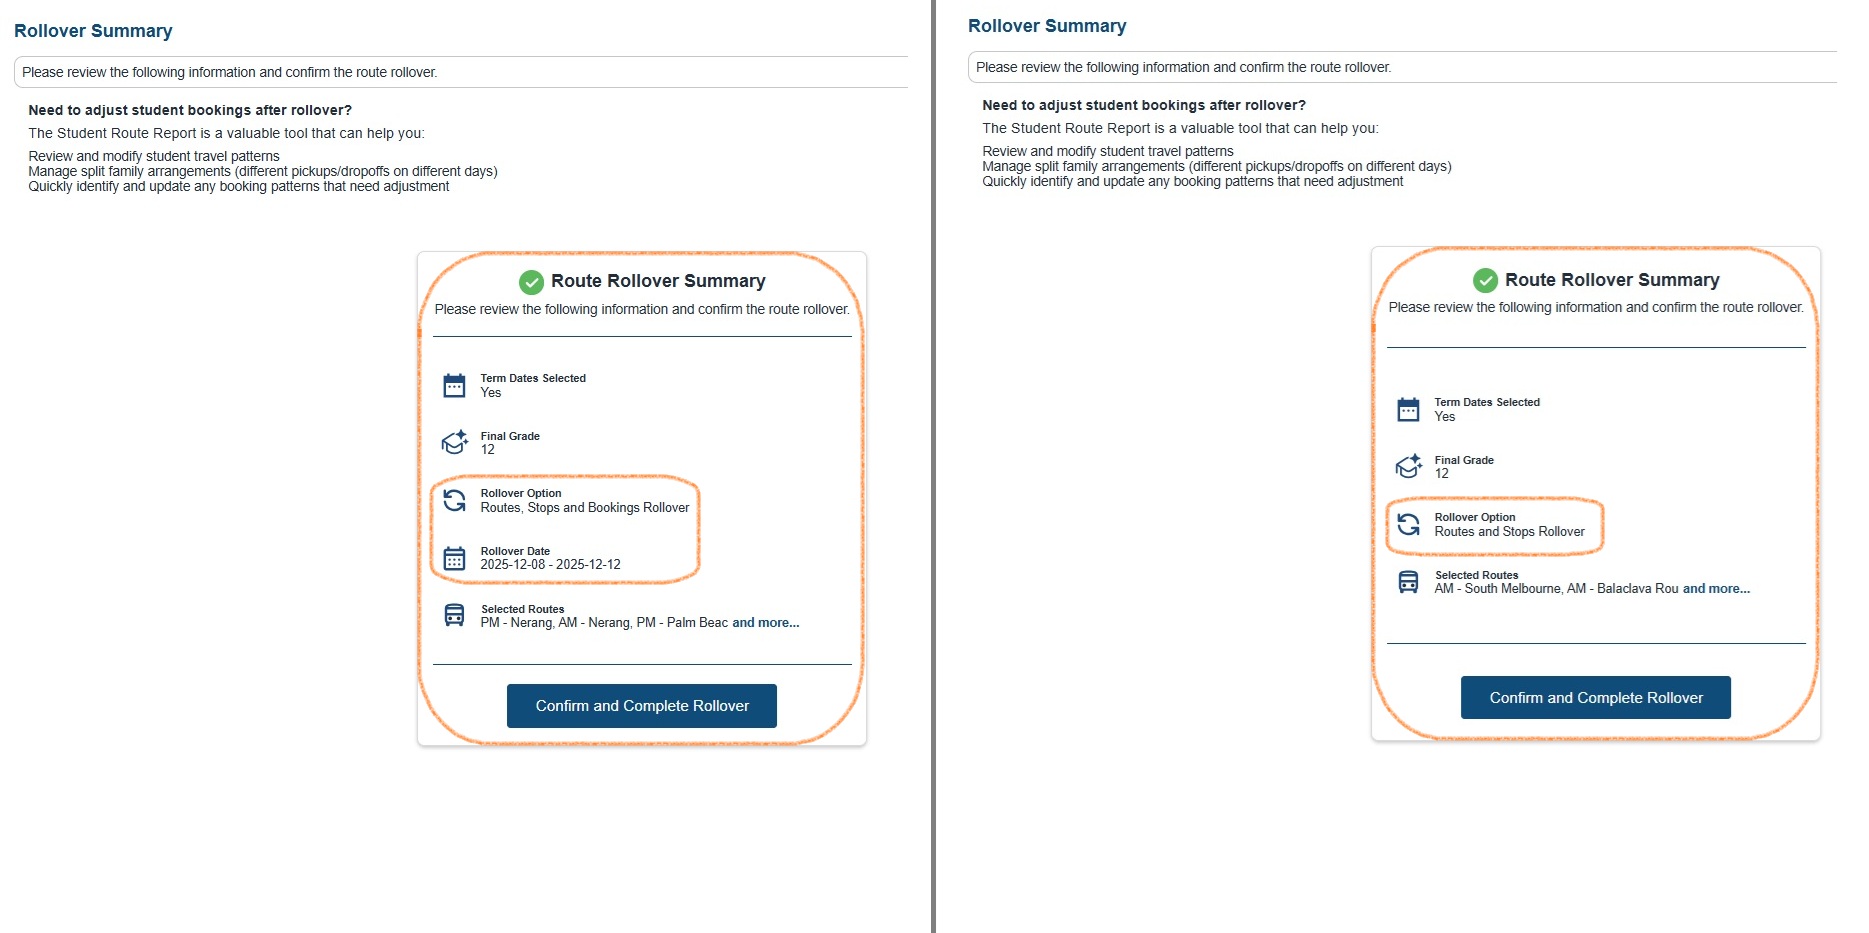
Before clicking Confirm and Complete Rollover, you can click through the headings on the left to do a final review and make sure everything looks correct.
Once you’re happy with your rollover selections, click Confirm and Complete Rollover at the bottom of the Summary page.
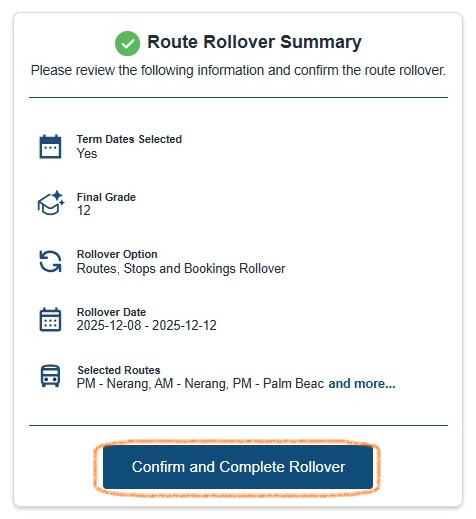
IMPORTANT! Once you click Confirm and Complete Rollover, the routes and bookings will be created — this action can’t be undone!
Next Step -> New Students and Parents - Continue here
Need Help?
If you need assistance with the Rollover, please contact our support team at support@rollcall.com.au
Was this article helpful?
That’s Great!
Thank you for your feedback
Sorry! We couldn't be helpful
Thank you for your feedback
Feedback sent
We appreciate your effort and will try to fix the article