Use this option to completely replace existing student records with new data.
⚠️ Every field will be overwritten.
⚠️ Empty cells will clear existing values.
What Full Update Means
RC ID is required to match existing students
⚠️ Every field will be overwritten. — even if only one value has changed
⚠️ Empty cells clear existing data
If a student is not found (invalid RC ID), the row will fail
The RC ID column must be included in your file
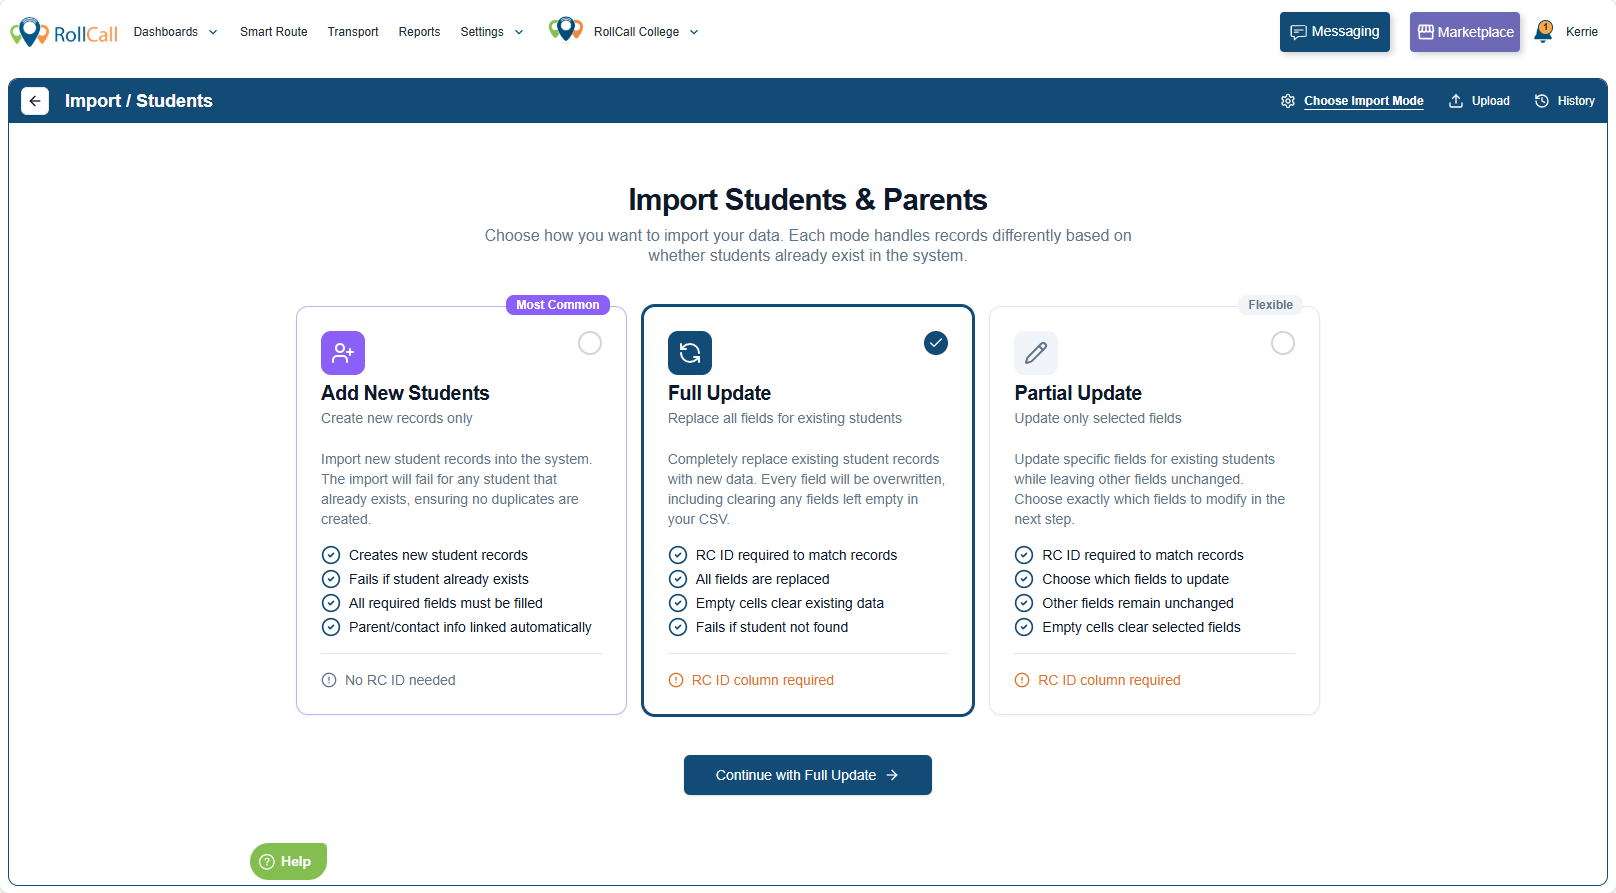
Step 1: Navigate to Import
Go to Students
Click Import (top right)
Select Full Update
Click Continue with Full Update
Step 2: Select Full Update
Step 3: Download the Template
Click Download Sample Template
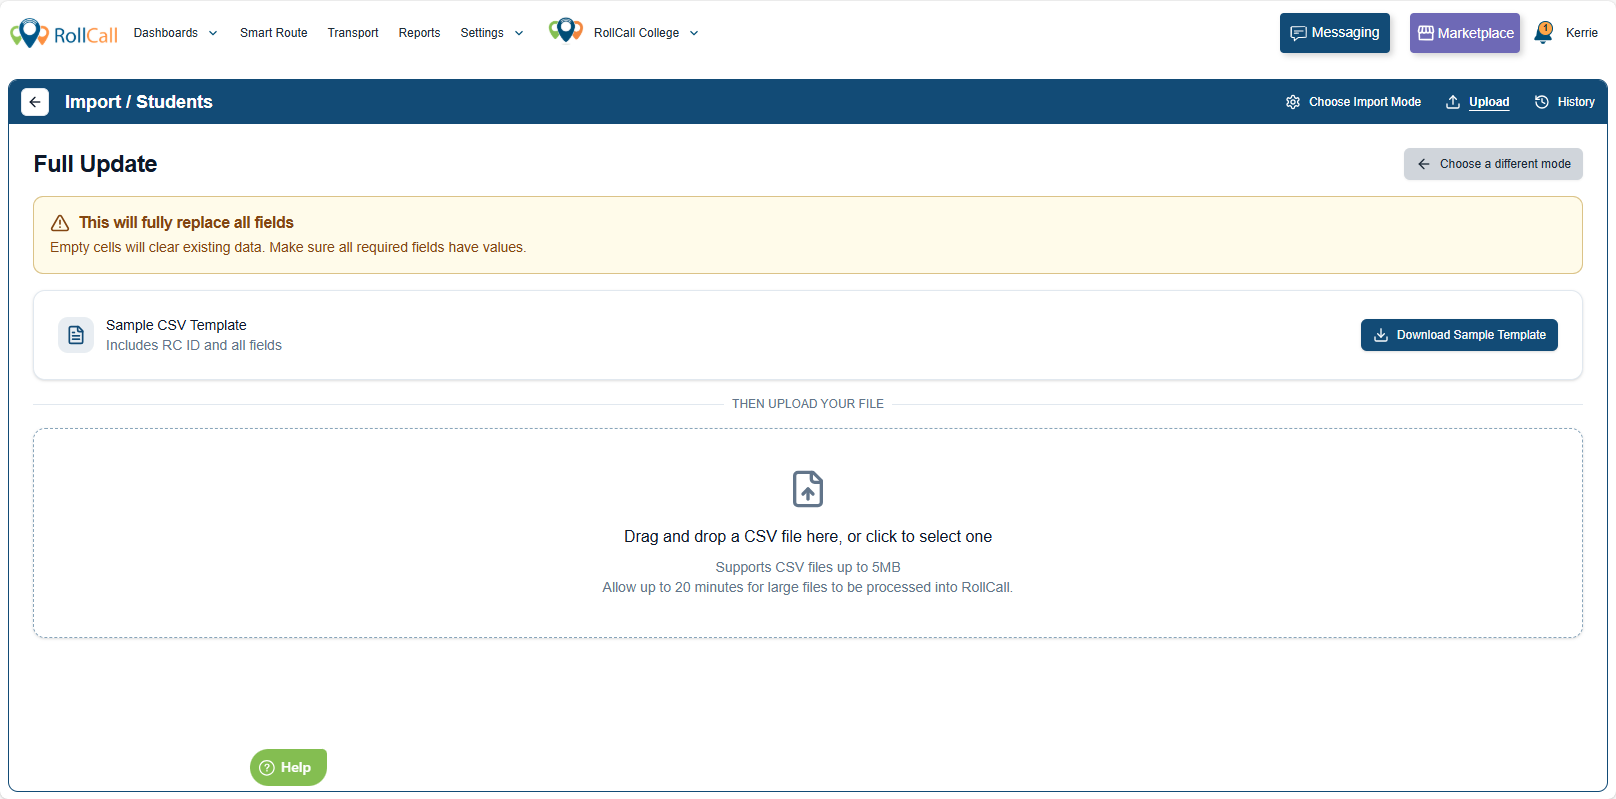
The template includes:
RC ID (required to match existing students)
All student fields
Important:
RC ID is required to match each student record
Delete the instructional second row before saving
Blank cells will clear existing data
Step 4: Edit your Template
Enter the updated data into the template.
Important:
⚠️ Any blank cells will clear existing data for that student.
Delete the second instructional row before saving
Steps
Review the column headers (Row 1)
These are the fields RollCall will replace. Do not rename or remove the headers.Use Row 2 as your guide
The second row explains what each column expects (for example:whether it is required
whether it should be text or a number)
Use this row to help you enter data correctly.
Ensure RC ID is included for every row
This is how RollCall matches each student record.- Capture the required data
⚠️ Blank cells will clear data only for the selected fields.
Delete Row 2 before saving
Row 2 is instructional only. If left in the file, it will trigger validation errors.
Save Your File
Save the file
Save as .csvRename the file clearly.
We recommend including:Date
Your name/initials
What the import is doing
Example:2026-03-02_JSmith_AddNewStudents.csv
Store the file in a secure, school-approved location.
Step 5: Upload and Review
After uploading, RollCall will validate your file.
Reviewing Your Data Before Importing
You can:
Review each row
Remove selected rows
Make minor corrections directly in the table
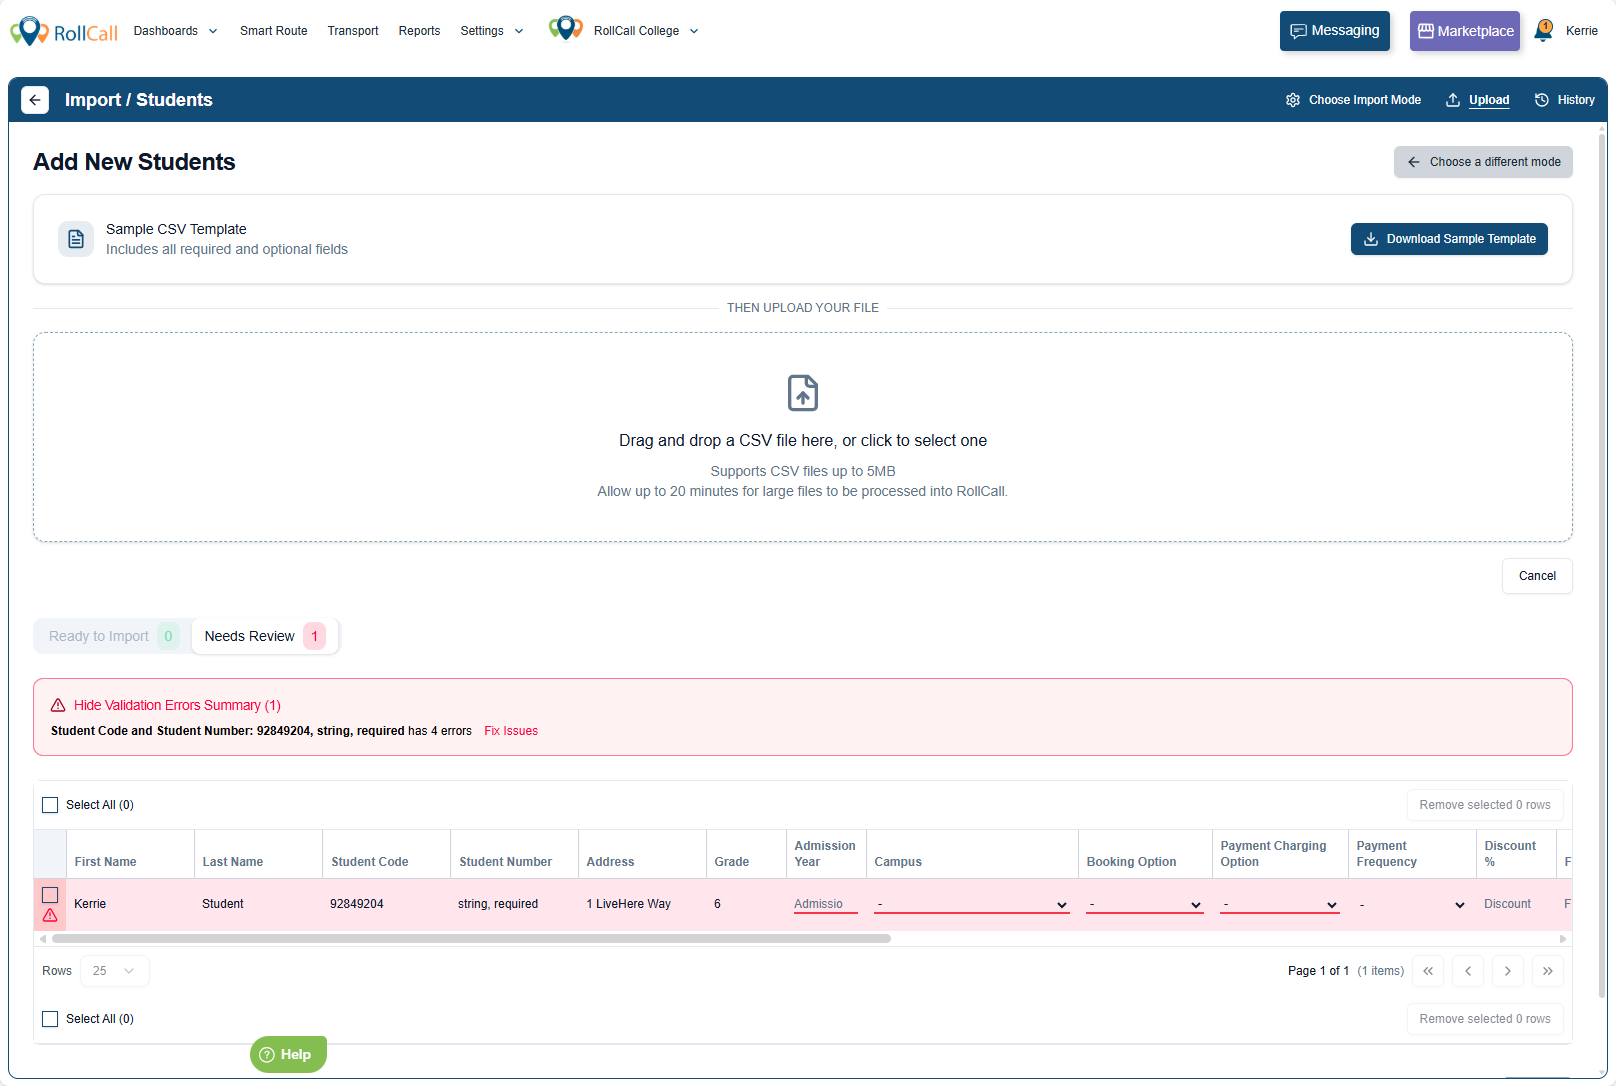
If Your File Has Errors
If something needs attention, you will see:
Needs Review
Highlighted rows in red
A Show Validation Errors Summary message
Click Show Validation Errors Summary to see what needs fixing.
Common Issues
- You forgot to delete the second instructional row
The second row explains the required data type (e.g. string, integer).
If left in the file, it will trigger validation errors. - Required fields are missing or invalid
If a required field is blank or the data type is incorrect, the row will be flagged. - A student already exists
Add New Students creates new records only. Existing students will not be duplicated.
How to fix your errors
Use on-screen edits for small corrections only.
If multiple rows need fixing or data formatting is incorrect, we recommend following the Fix via CSV Re-Upload instructions below.
Fix via on screen editing
Use this method for
Fixing a typo
Updating a single field
Adjusting a small number of records
If a row is highlighted or needs a small correction, you can edit it directly in RollCall before importing.
To edit a row:
Click on the row you want to update
Scroll to the bottom edit section (if displayed)
Click into the field that needs correcting
Update the value
Click Review when finished
The row will update and be revalidated automatically.
Fix via CSV file
Use this method for:
Fixing multiple rows
Correcting formatting issues
Updating several fields at once
Making structural changes to your data
If your file contains multiple errors or requires significant updates, correct the original CSV file and re-upload it.
To re-upload a corrected file:
Open your CSV file
Correct the required data
Delete the instructional second row (if still present)
Save the file as .csv
Return to the Import screen
Click Upload File
When prompted, confirm that you want to replace the currently uploaded file
Click Upload File
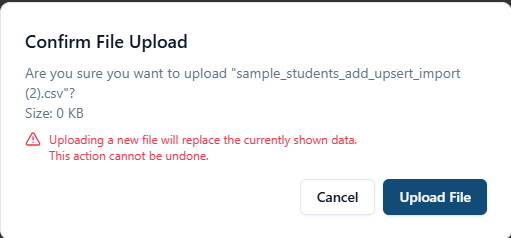
Once confirmed, the new file will replace the previous one and be validated again automatically.
When validation passes, click Select All, then Import Students as normal.
What Happens Next?
Existing student records are fully replaced with the uploaded data
Blank cells remove existing values
Rows with invalid RC IDs will not import
The admin who performed the import is recorded in the Student Audit Logs
Frequently Asked Questions (FAQs)
Was this article helpful?
That’s Great!
Thank you for your feedback
Sorry! We couldn't be helpful
Thank you for your feedback
Feedback sent
We appreciate your effort and will try to fix the article