Setup Guide for Schools using the Custom Push Integration to synchronise student and parent data with RollCall
1. Overview
The Custom Push Integration allows a school to provide student, parent and relationship data directly to RollCall using a predefined JSON format.
Unlike RollCall's standard Student Sync integrations, RollCall does not connect to your Student Management System to retrieve the data.
Instead:
Your School/System → Sends JSON to RollCall → RollCall validates and processes the data → Student Sync
Data can be provided using:
- JSON File Upload within the RollCall Admin Portal
- API POST Request, where API access has been configured
Before beginning setup, your school or integration provider will need to prepare the required JSON dataset.
2. Before You Begin
Before configuring the integration, confirm how your school will provide data to RollCall.
You will need to determine:
How will data be provided?
Choose between:
- Manual JSON file upload through RollCall
- API POST request
Will parents already be filtered?
Determine whether your system can send only the parents your school wants synchronised to RollCall.
If yes, RollCall will treat the supplied parents as the exact records you want synchronised.
If not, additional parent information will need to be supplied so RollCall can apply Parent Filtering.
How will updated data be provided?
If you intend to use the nightly Student Sync process, your school will need a process for regularly providing RollCall with an updated dataset.
3. Prepare Your JSON Data
Your JSON file is separated into the following areas:
- Students
- Parents
- Relationships
- Deleted Students
- Deleted Parents
A basic structure looks like:
{
  "students": [],
  "parents": [],
  "relationships": [],
  "deleted_student_numbers": [],
  "deleted_parent_codes": []
}
4. Student Data
Each student record can contain:
| Field | Purpose |
|---|---|
| first_name | Student's first name |
| last_name | Student's last name |
| student_number | Unique Student Management System identifier |
| code | Student's card/scanning number |
| dob | Date of birth |
| grade | Current grade |
| modified_at | When the student was last updated |
| enrollment_date | Student's expected start date |
| address | Student's address |
| campus | Student's campus |
Important
The student_number must be unique and consistent. This is used to identify the student during the synchronisation.
The code should also be unique as this is used as the student's card number for scanning. If the supplied value is not unique, RollCall will assign a random value.
If no Grade is supplied, the student's Grade defaults to 0.
5. Parent Data
Each parent record can contain:
| Field | Purpose |
|---|---|
| first_name | Parent's first name |
| last_name | Parent's last name |
| Parent's email address | |
| phone | Mobile phone number |
| code | Unique identifier from your system |
| dob | Date of birth |
| modified_at | When the parent was last updated |
Important
The parent's email address must be unique.
RollCall uses the email address as the parent's main identifier and to connect the parent to their student relationships.
The code must also be unique for each parent.
6. Configure Parent Filtering
There are two ways Parent Filtering can be handled.
Option 1 – Your School Filters Parents
If your system can determine which parents should have access to RollCall, only include those parents in the JSON.
RollCall will treat the supplied parent records as the exact parents your school wants synchronised.
No additional Parent Filtering is required.
Option 2 – RollCall Filters Parents
If your system cannot filter the parents before sending the data, include the following additional fields against the parent:
prioritylives_with_studentis_correspondence
RollCall can then use these values when applying Parent Filtering.
Your school's approach to Parent Filtering should be confirmed with RollCall during setup.
7. Configure Student–Parent Relationships
Relationships tell RollCall which students belong to which parents.
Each relationship requires:
| Field | Purpose |
|---|---|
| parent_email | Must match the parent's email supplied in the Parent data |
| student_number | Must match the student's Student Number |
| relationship_name | Relationship between the student and parent |
If no Relationship Name is provided, RollCall defaults the relationship to PARENT.
Important: The
parent_emailandstudent_numbermust match records supplied within your Parent and Student data.
8. Future Students
The enrollment_date can be supplied to identify when a student is expected to commence at the school.
RollCall uses this date to populate the student's expected start date and determine whether they are a future student.
For Custom Push, all students included in the JSON are synchronised.
RollCall does not automatically exclude students because their enrolment date is in the future.
9. Configure the Custom Push Integration
Once your data is ready, the Custom Push Integration can be configured within RollCall.
Navigate to:
Integrations → Student Sync → Custom Push
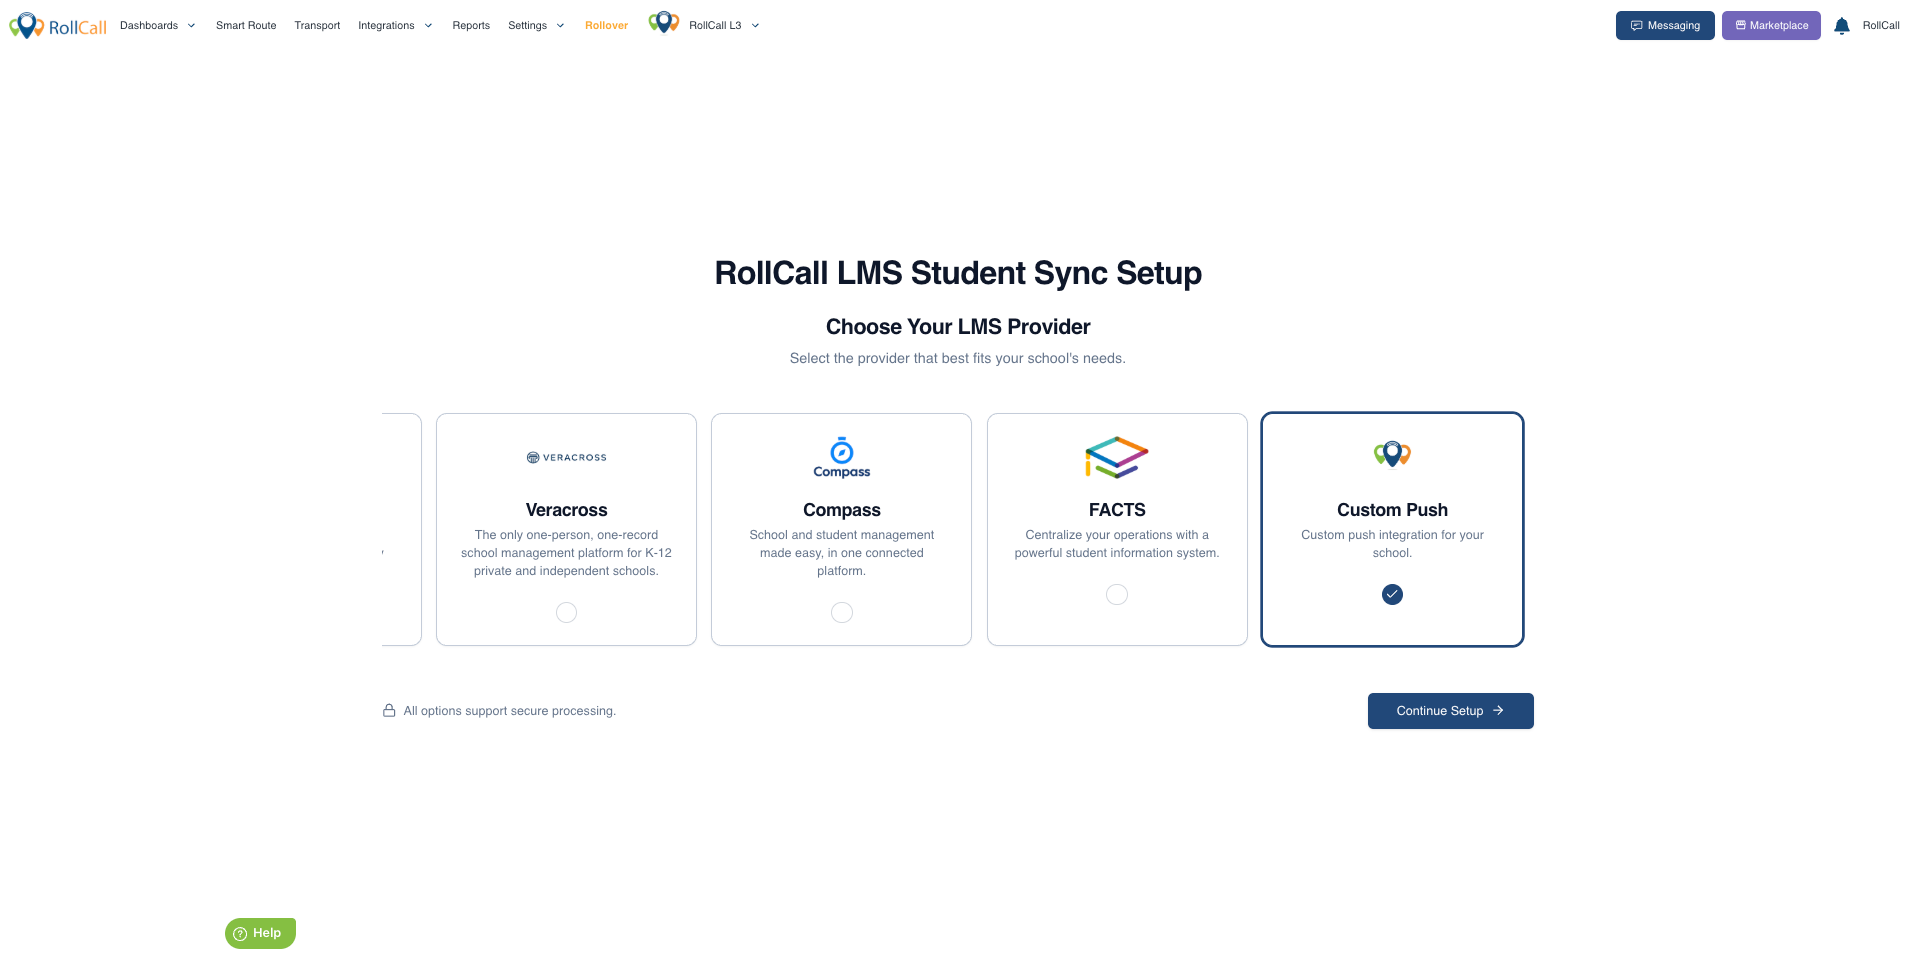
The Custom Push setup is simpler than a standard Student Sync integration because RollCall does not need to connect to an external system.
You will therefore not need to provide:
- API Key for your Student Management System
- Base URL
There is also no standard Nightly Sync toggle because RollCall is not responsible for retrieving updated data from your system.
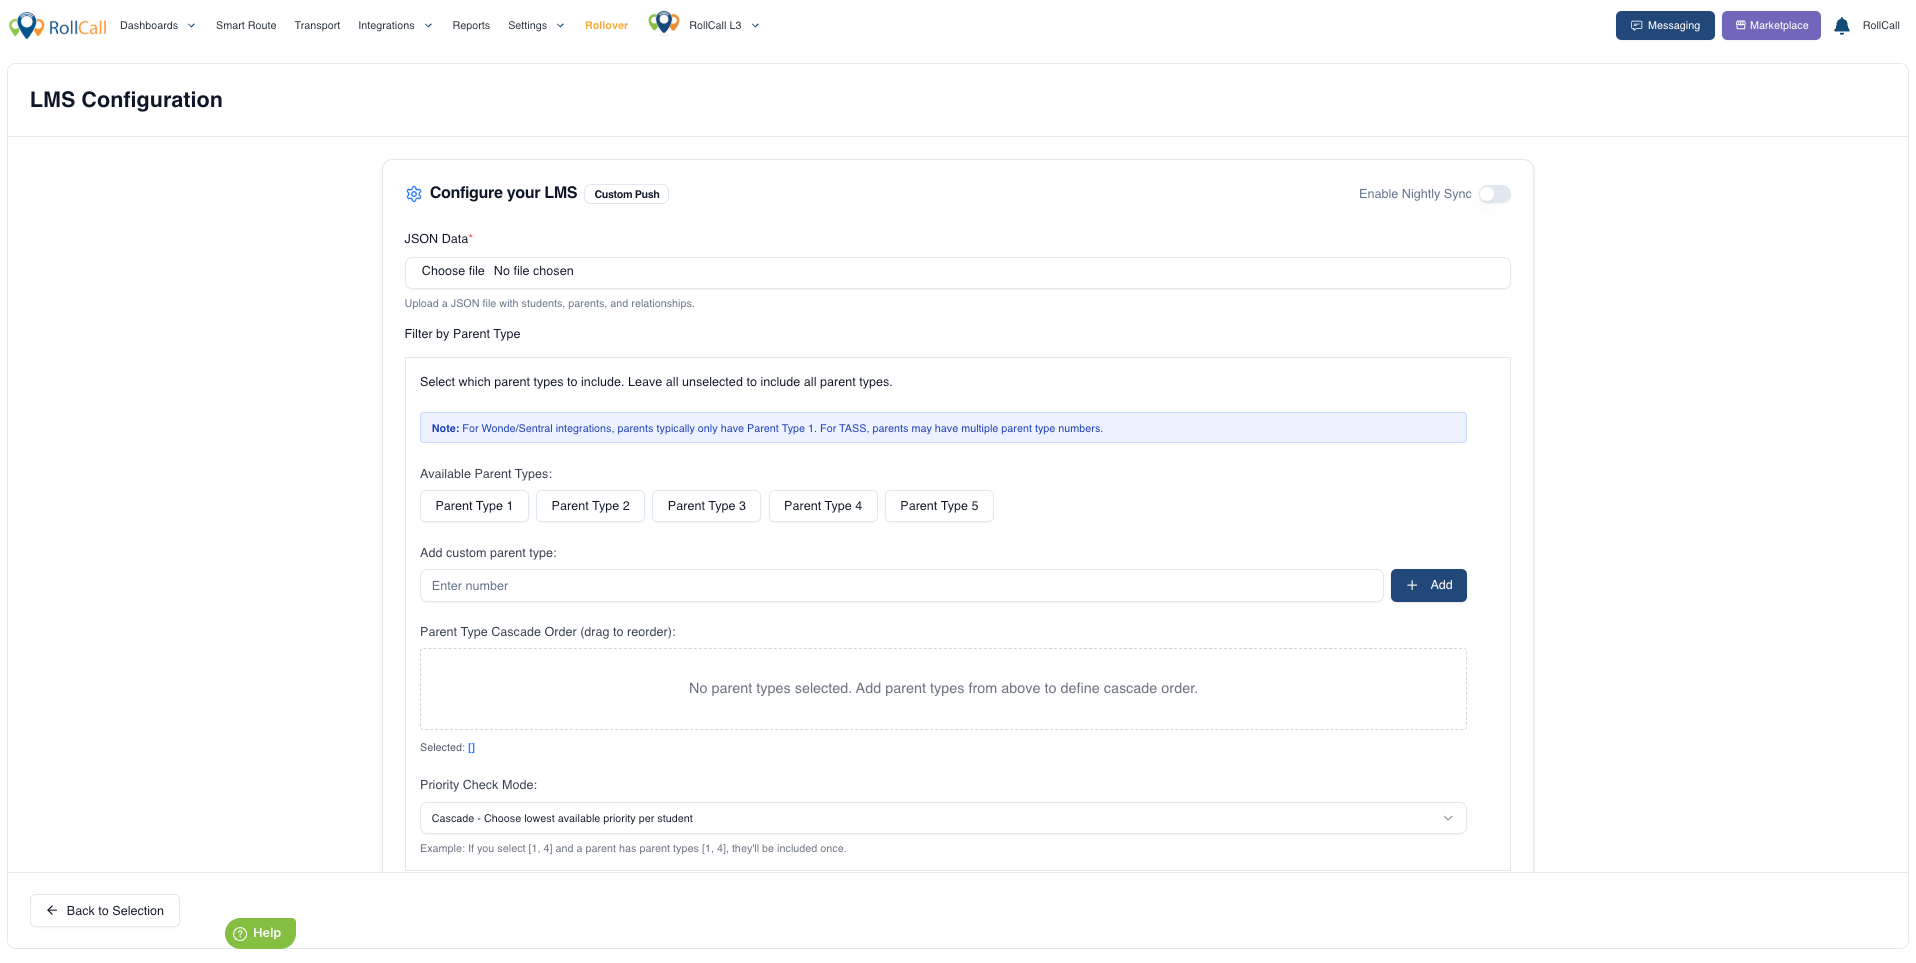
10. Upload Your JSON
Once the integration has been configured:
- Open your Custom Push Integration.
- Locate the JSON file upload.
- Select your prepared JSON file.
- Upload the file.
RollCall stores the most recently uploaded JSON against the integration.
This becomes the dataset used when generating your Preview and completing the subsequent synchronisation.
Uploading the file does not immediately update student or parent records.
11. Generate a Preview
After uploading your JSON:
- Select Generate Preview.
- Choose the required Sync Mode when prompted.
- Allow RollCall to process the supplied dataset.
- Review the proposed changes.
The Preview should be reviewed carefully before completing the first live synchronisation.
Pay particular attention to:
- Students being added or updated
- Parent records
- Student–parent relationships
- Unexpected student changes
- Unexpected parent changes
If the Preview does not look correct, do not proceed with the Sync. Review the supplied JSON or contact RollCall Support.
12. Complete the Sync
Once you are satisfied with the Preview, proceed with the Student Sync.
RollCall uses the most recently supplied JSON dataset as the source for the synchronisation.
The dataset may have come from:
- The JSON file uploaded through RollCall, or
- The latest API POST request
RollCall then processes the information using the standard Student Sync workflow.
13. Configure Your Ongoing Sync Process
After completing the initial setup, determine how updated information will continue to reach RollCall.
Manual Upload
Your school can periodically generate a new JSON file and upload it through the RollCall Admin Portal.
The newly uploaded dataset replaces the previous dataset as the information used for the next sync.
API
Where API access has been configured, your system can send updated JSON directly to RollCall.
Authentication details will be provided as part of the API setup.
14. Nightly Sync Process
RollCall's nightly Student Sync task runs at:
14:00 UTC
If your school wants the nightly process to use current information, an updated dataset should be provided at least one hour before the nightly task runs.
What if we don't provide new data?
RollCall does not retrieve a replacement dataset.
Instead, the nightly process will use the most recently saved JSON data.
Important: Schools using an automated Custom Push integration should ensure their latest dataset is successfully provided before the nightly RollCall sync.
15. Removing Students and Parents
The JSON supports dedicated lists for records that should be removed:
Students
"deleted_student_numbers": []Use the student's unique Student Number to identify students requiring removal.
Parents
"deleted_parent_codes": []Use the parent's unique Parent Code to identify parents requiring removal.
This allows your integration to explicitly tell RollCall when previously synchronised records should no longer be included.
16. Final Setup Checklist
Before activating the integration, confirm:
- Your JSON follows the required RollCall format.
- Student Numbers are unique.
- Student Card Numbers are unique where possible.
- Parent Email Addresses are unique.
- Parent Codes are unique.
- Student–parent relationships reference the correct records.
- Your Parent Filtering approach has been confirmed.
- Enrolment Dates are supplied where required.
- Campus values match your RollCall configuration.
- All date/time values include timezone information.
- The JSON has been successfully uploaded or submitted.
- A Preview has been generated and reviewed.
- Your process for providing future updates has been established.
Once these checks have been completed, the Custom Push Integration is ready for ongoing use.
Was this article helpful?
That’s Great!
Thank you for your feedback
Sorry! We couldn't be helpful
Thank you for your feedback
Feedback sent
We appreciate your effort and will try to fix the article