Schools using RollCall Pay now have a dedicated dashboard for monitoring payment performance and transaction activity.
Access the dashboard from the menu option - Integrations/RollCall Pay.
Step 1: Navigate to RollCall Pay
To begin setting up RollCall Pay, go to: Integrations → RollCall Pay

Step 2: Select your Payment Gateway type
You will now be presented with the different payment options.
- Select your Payment Provider
- Click Continue Setup to move to the Payment Wizard.
You will now be guided through a five-step Payment setup wizard.

Step 3: Payment Setup Wizard Overview
The Overview screen outlines:
- Minimum prerequisites
- The overall setup process
- Security notifications to consider
The setup follows four simple stages:
- Connect your account
- Configure your payment settings
- Test the integration
- Go live with payments
Click Continue to move to Step 2.
 ⸻
⸻
Step 4: Payment Settings
On this page of the wizard you will configure:
- Currency
- Percentage surcharge (if applicable)
- Fixed surcharge amount (if applicable)
After entering your details, click Save, then Continue.
Step 5: API Credentials
Enter your:
- Client ID
- Secret Key
You can select Save and Test to validate your credentials before proceeding.
Once confirmed, click Continue.

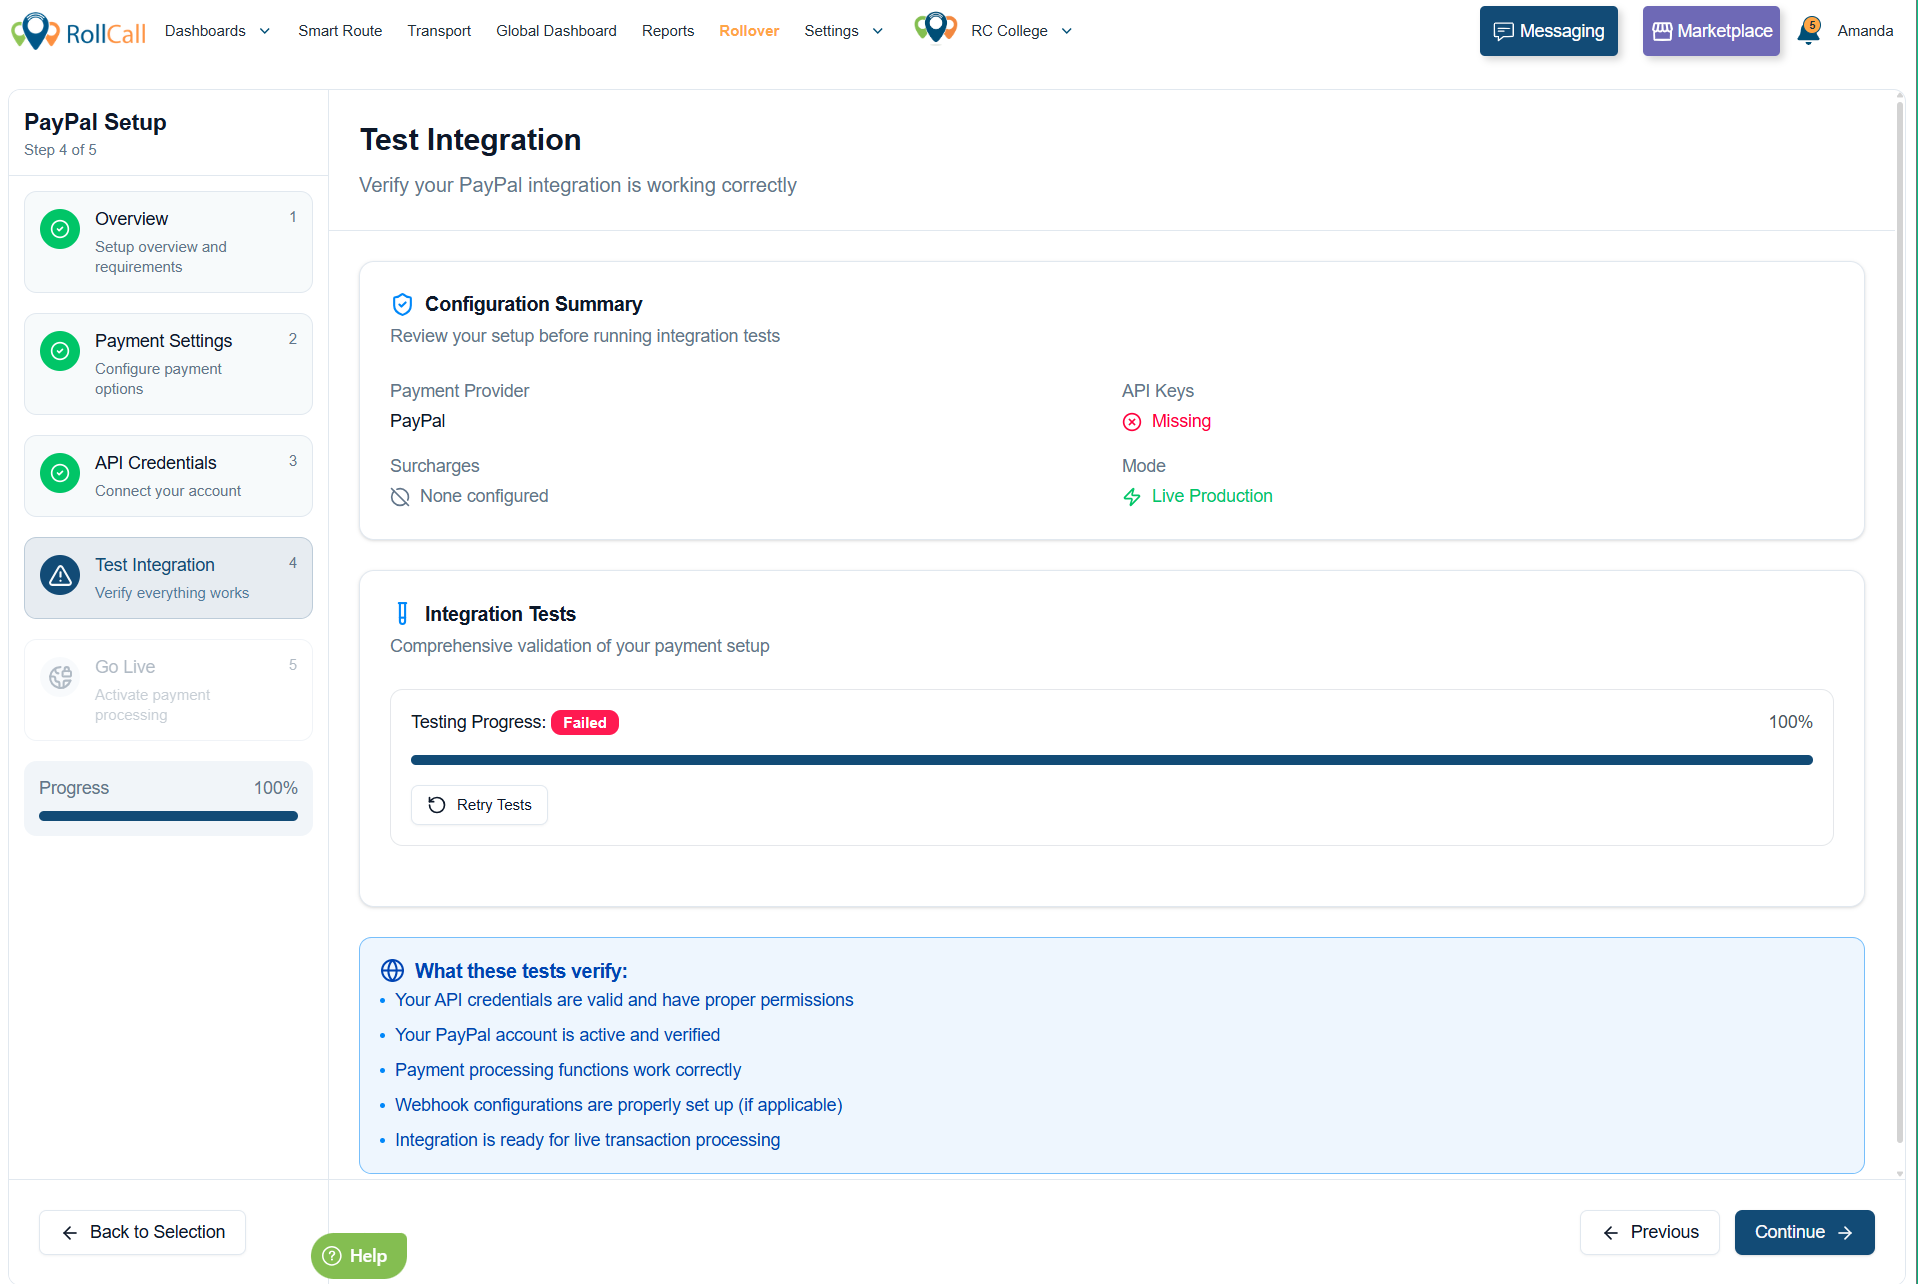
Step 6: Test Integration
This step verifies that:
- Your API credentials are correct
- The payment gateway connection is working
This acts as a sandbox validation before going live.
If successful, click Continue.

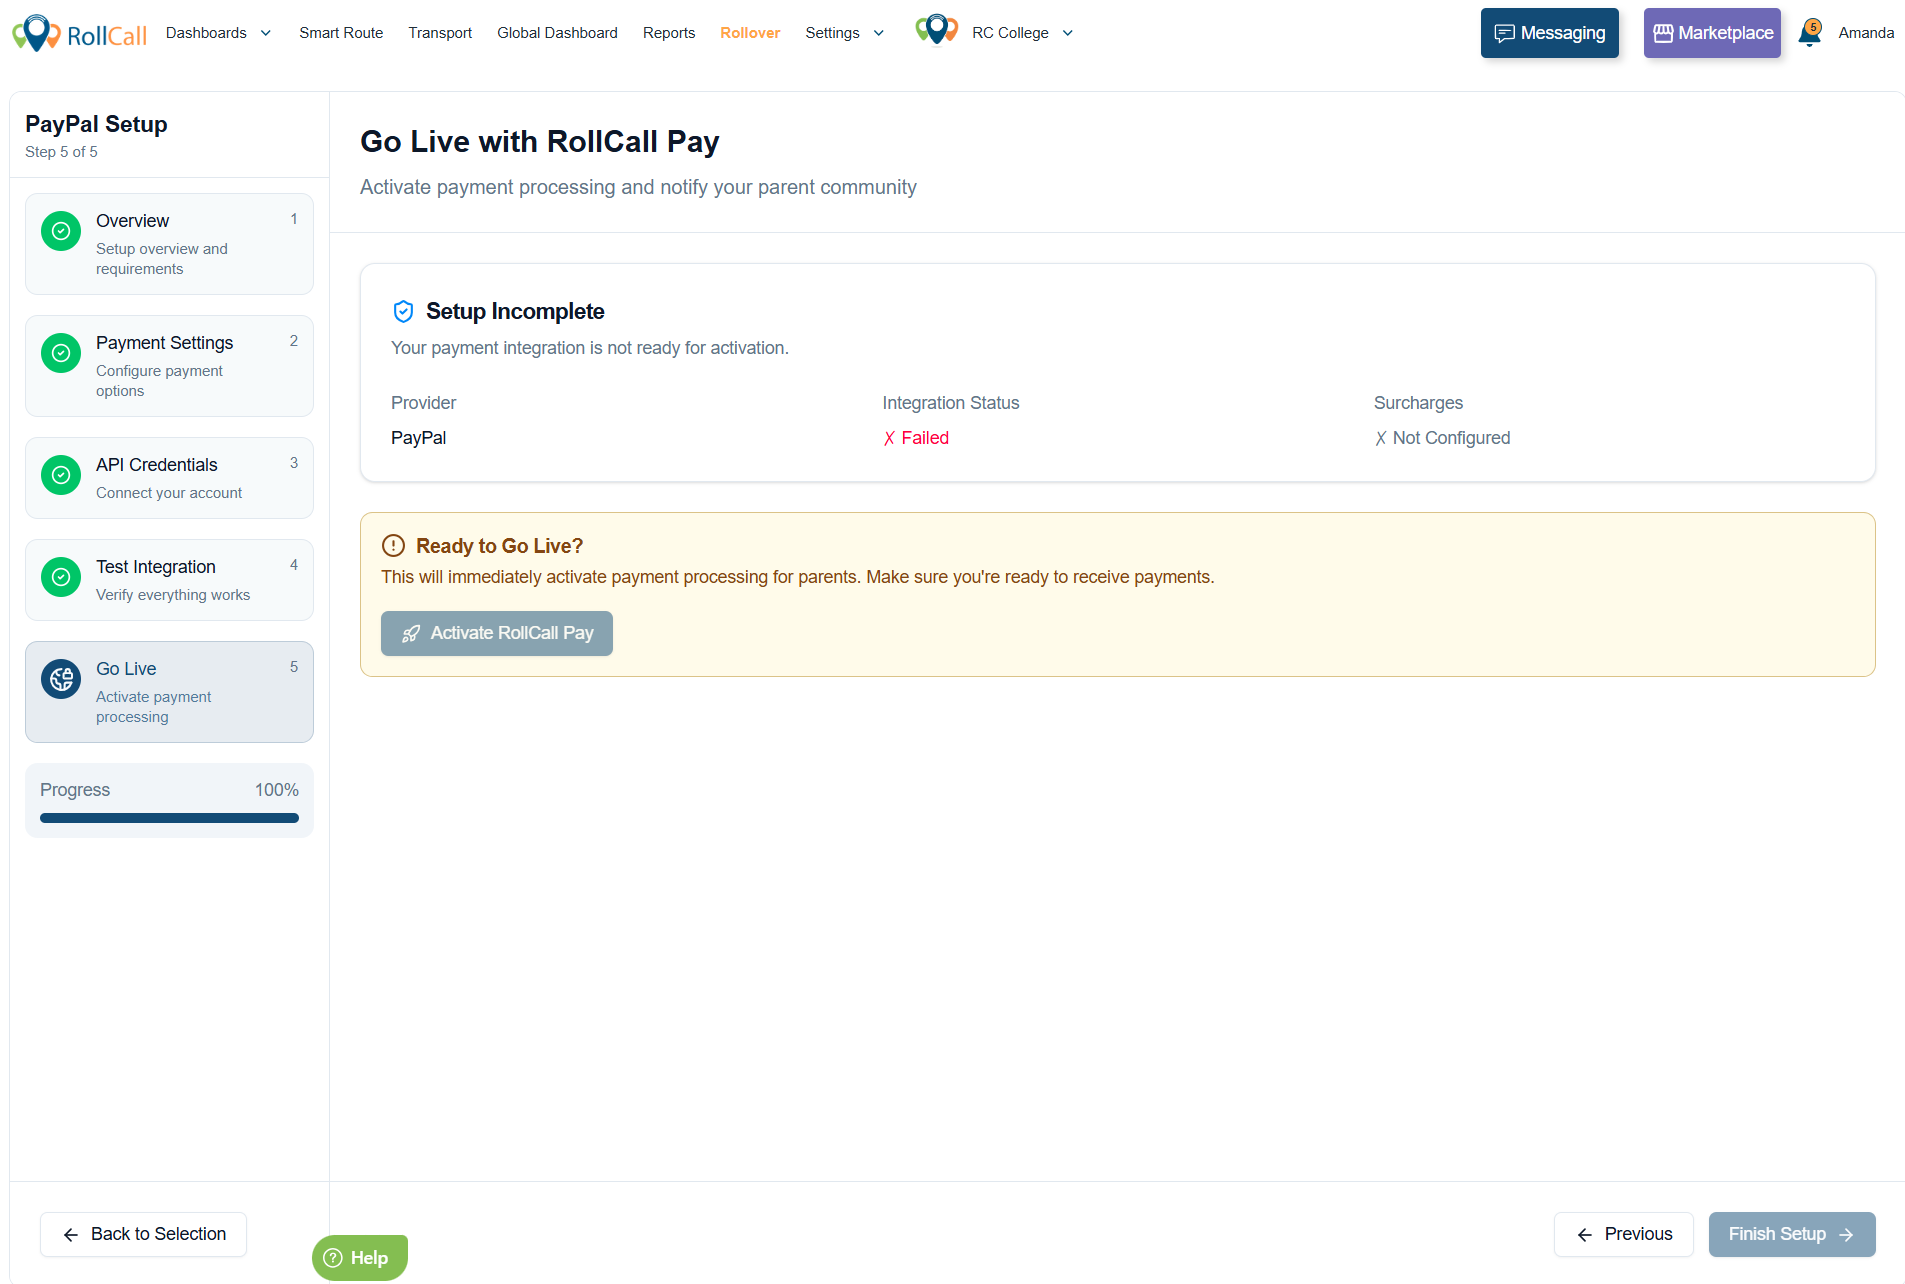
Step 7: Go Live
You will see a summary of:
- Integration status (Successful or Failed)
- Configured surcharges
- Setup completion status
If everything is correct, select: Activate RollCall Pay
Your payment processing is now live.
Other useful links:
Was this article helpful?
That’s Great!
Thank you for your feedback
Sorry! We couldn't be helpful
Thank you for your feedback
Feedback sent
We appreciate your effort and will try to fix the article